The Radio
Cart
What is it?
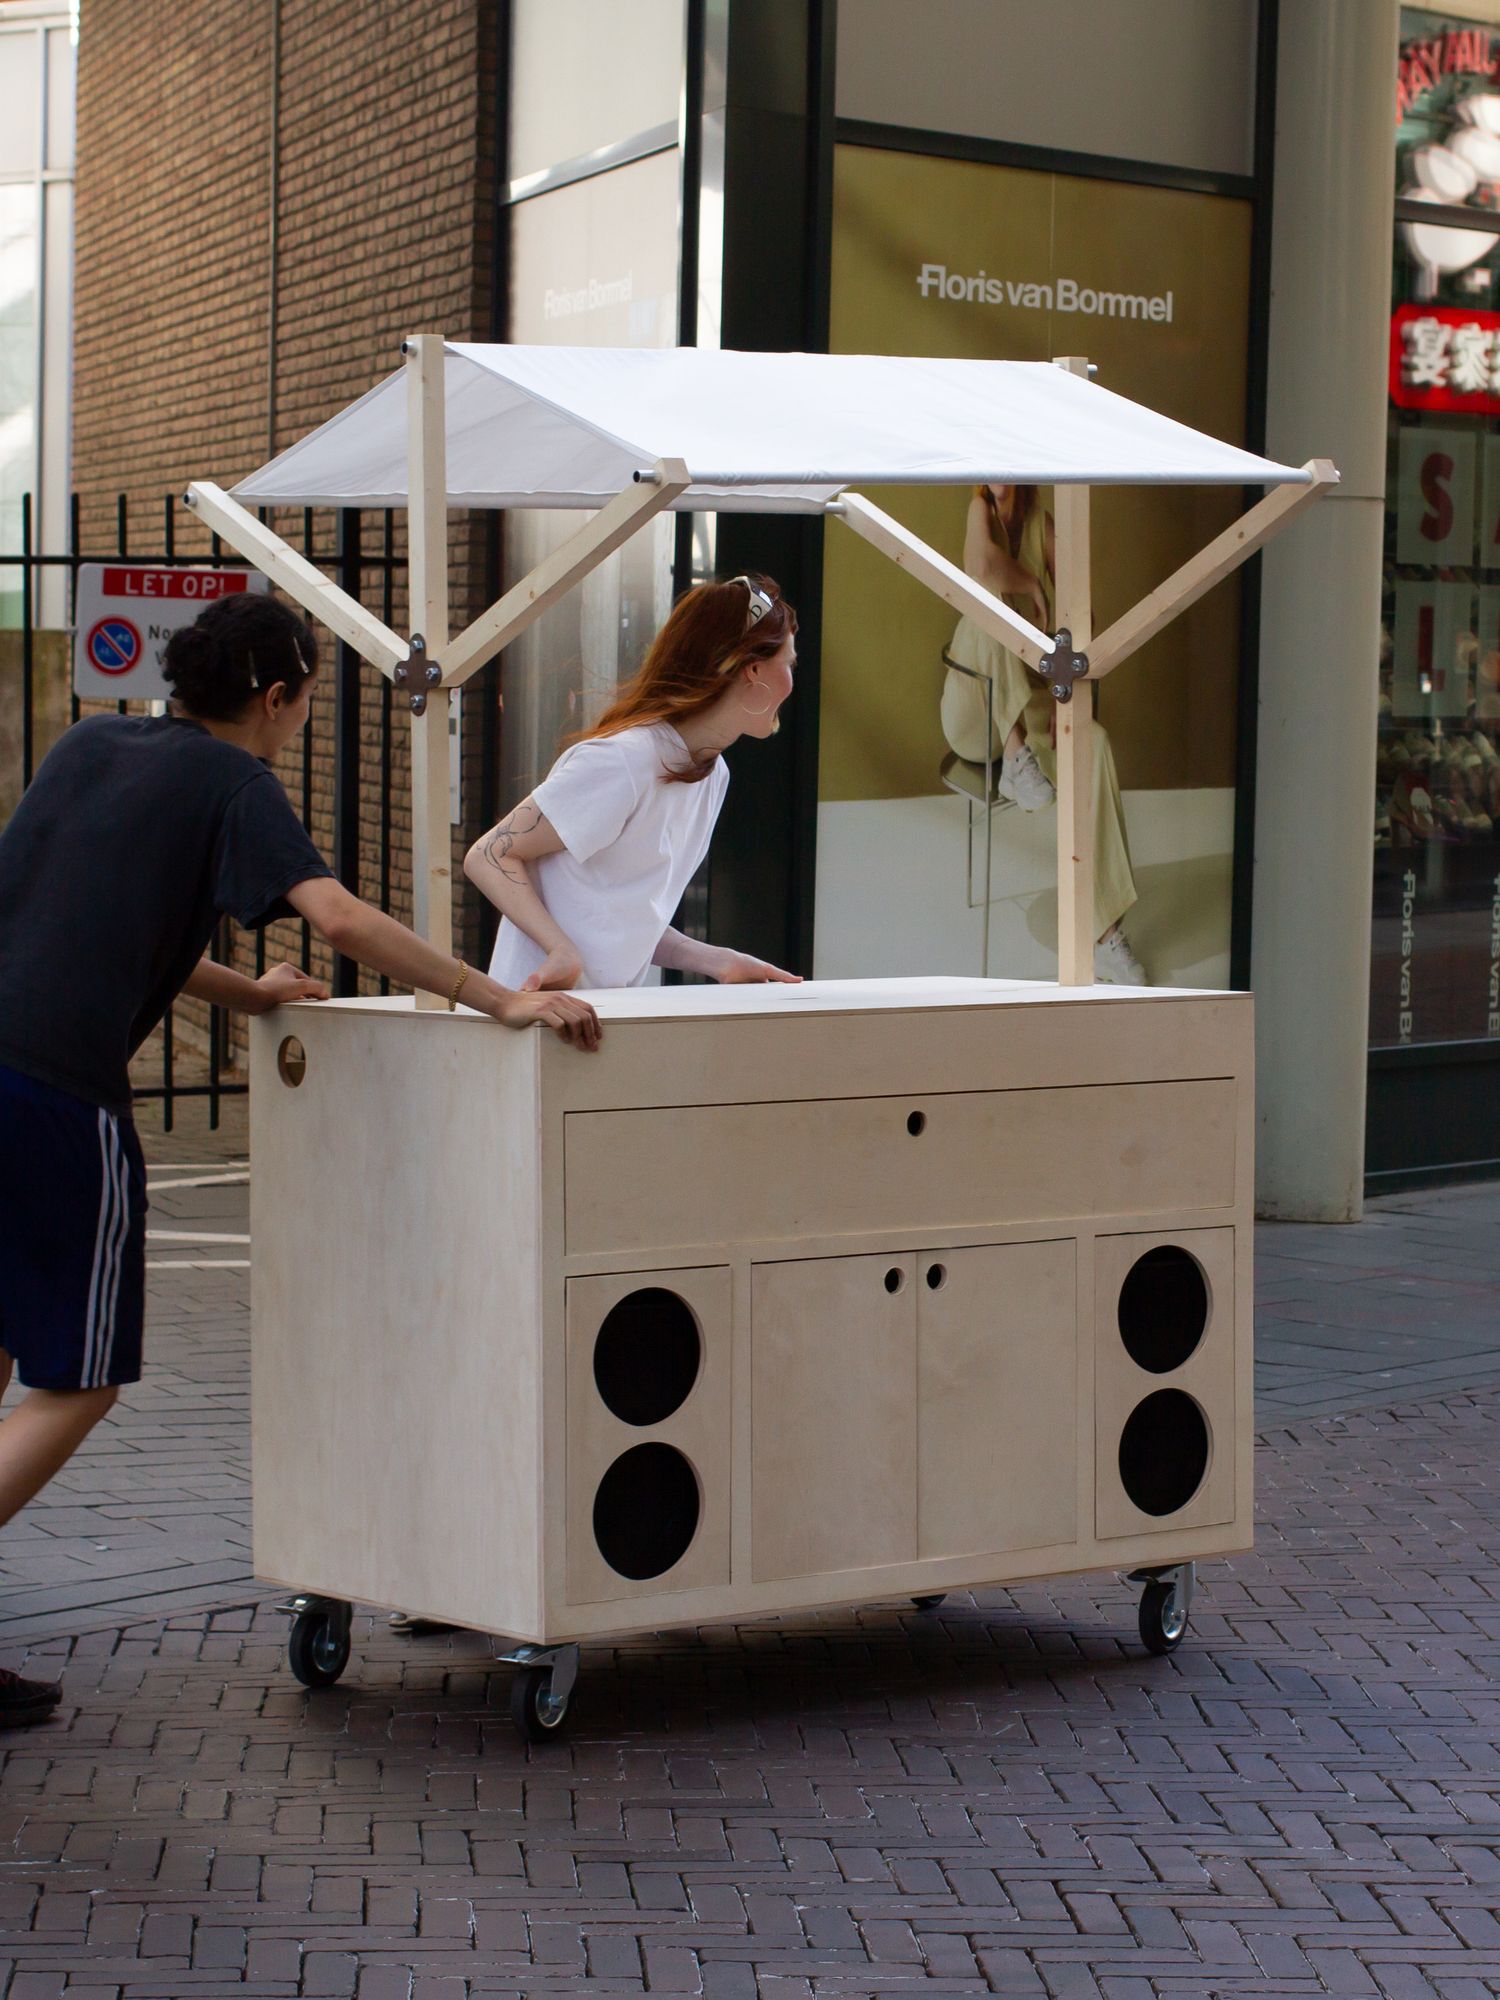
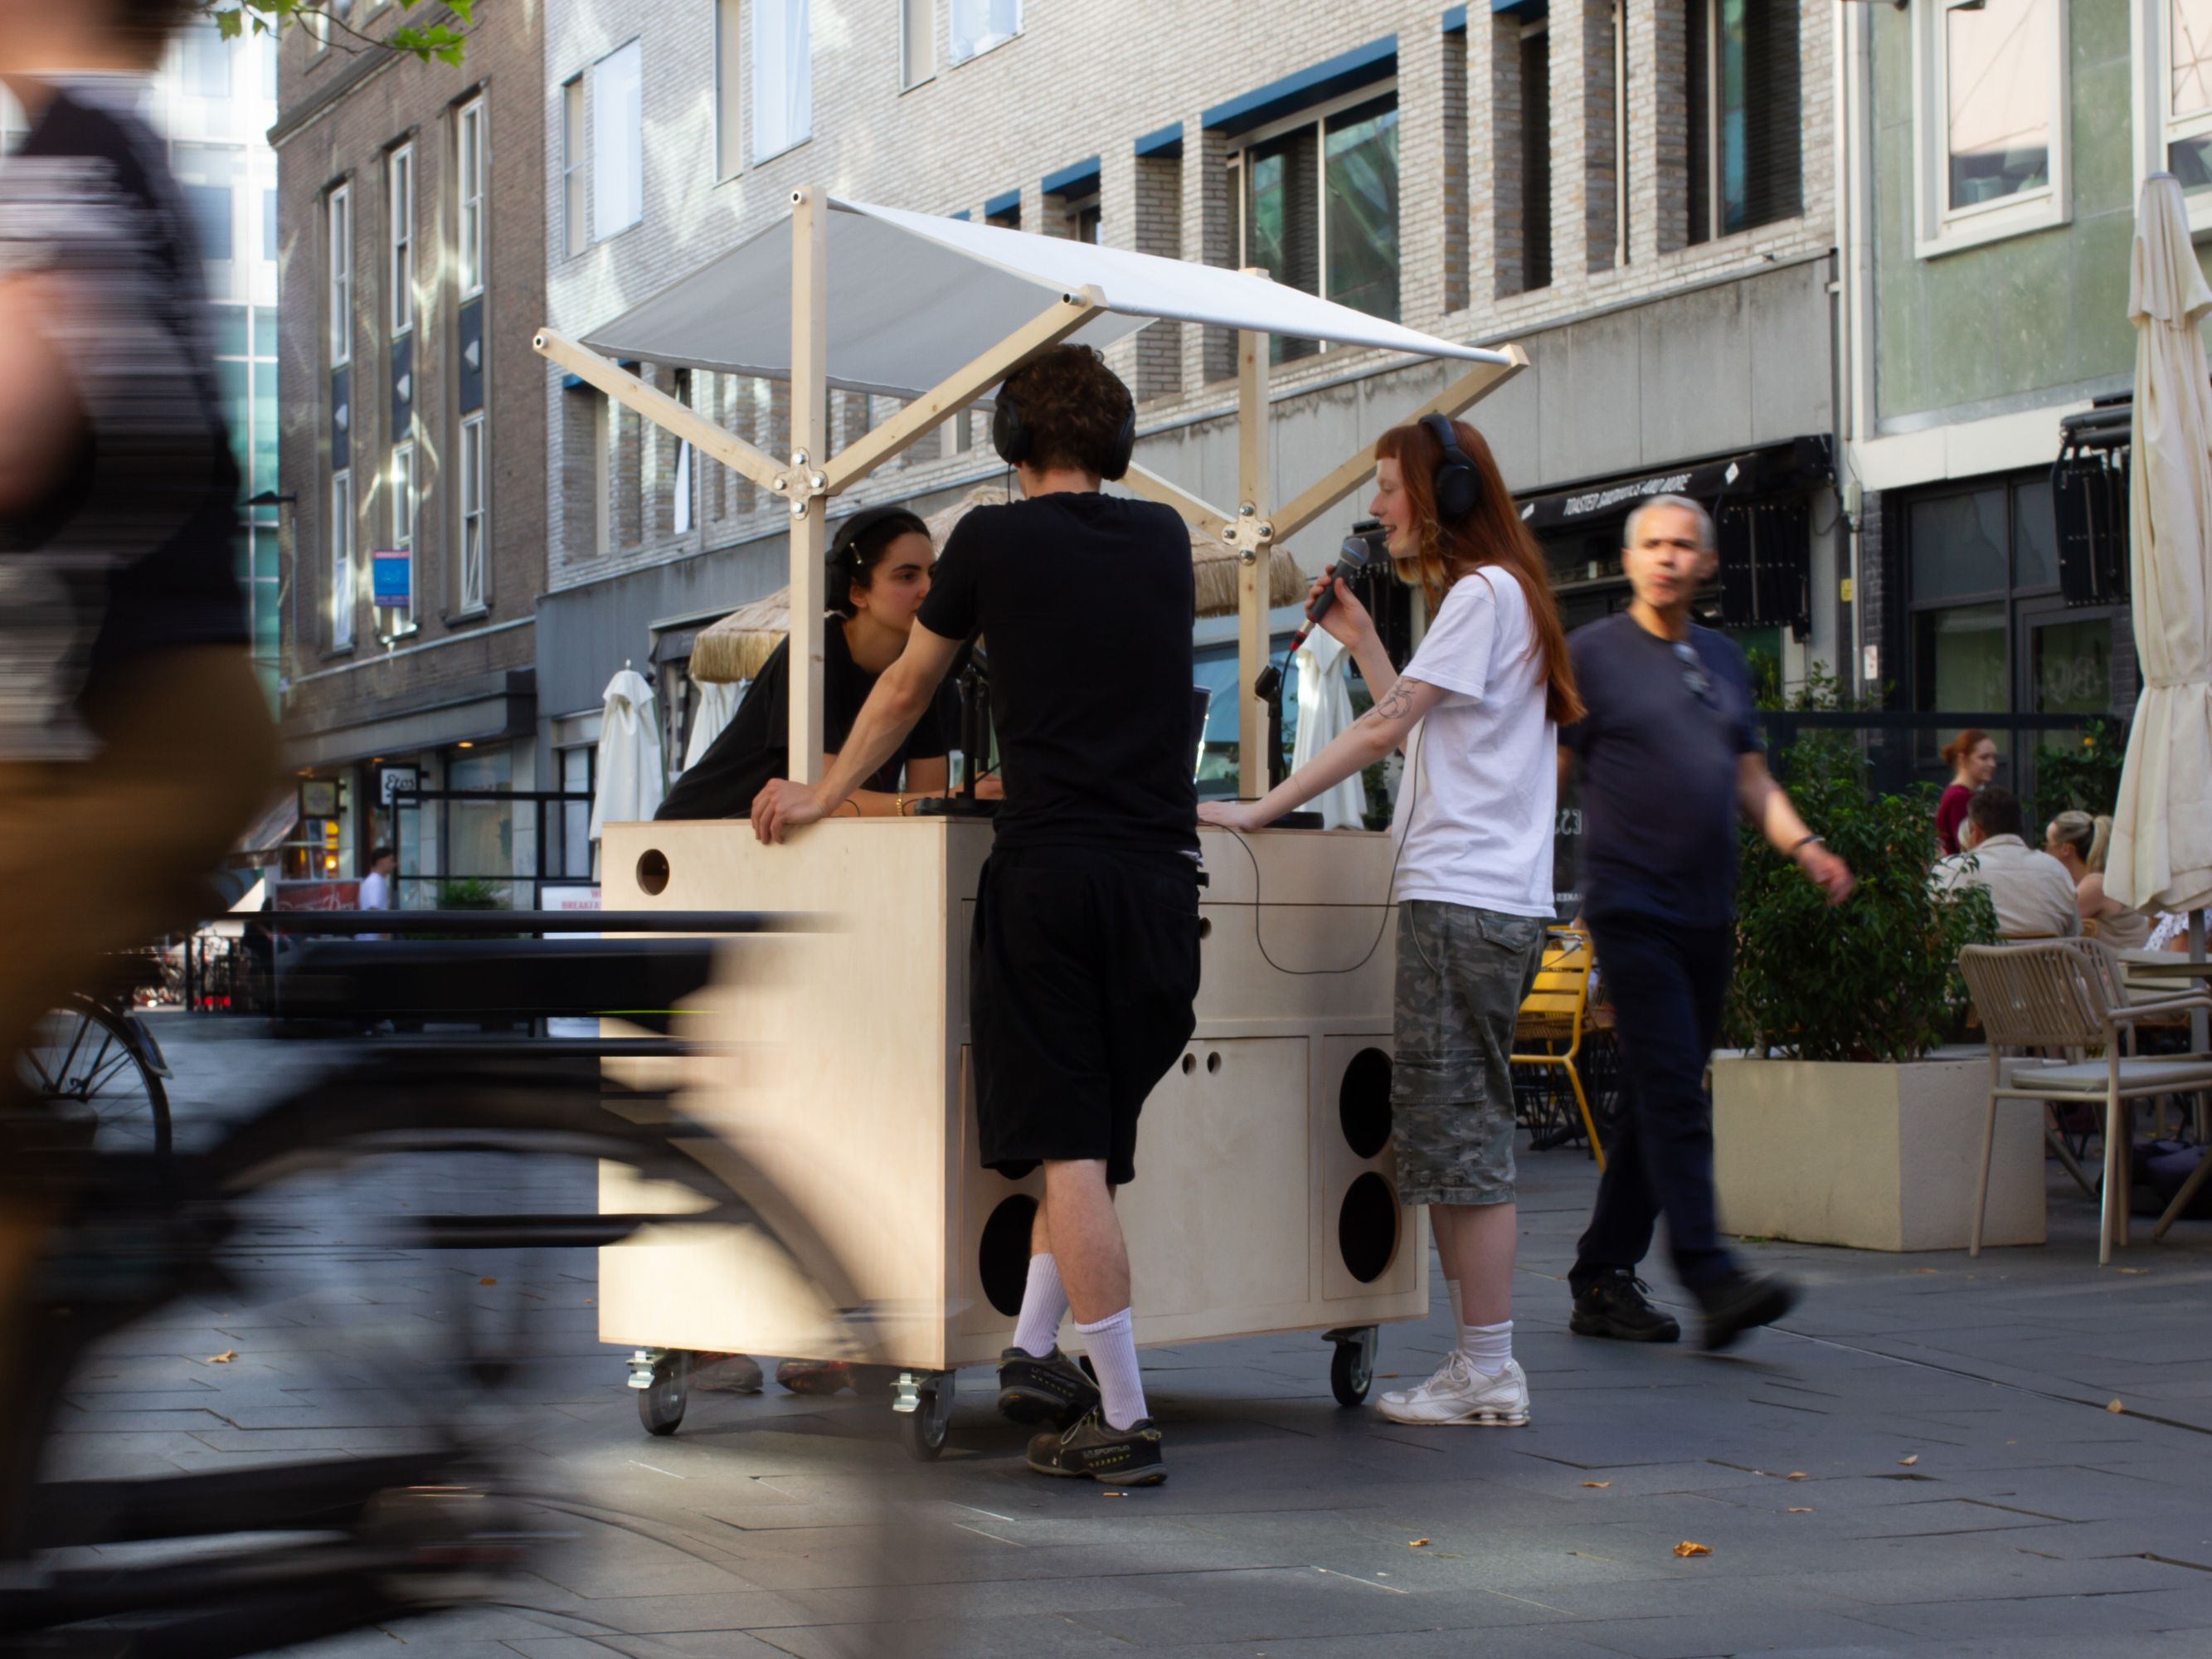
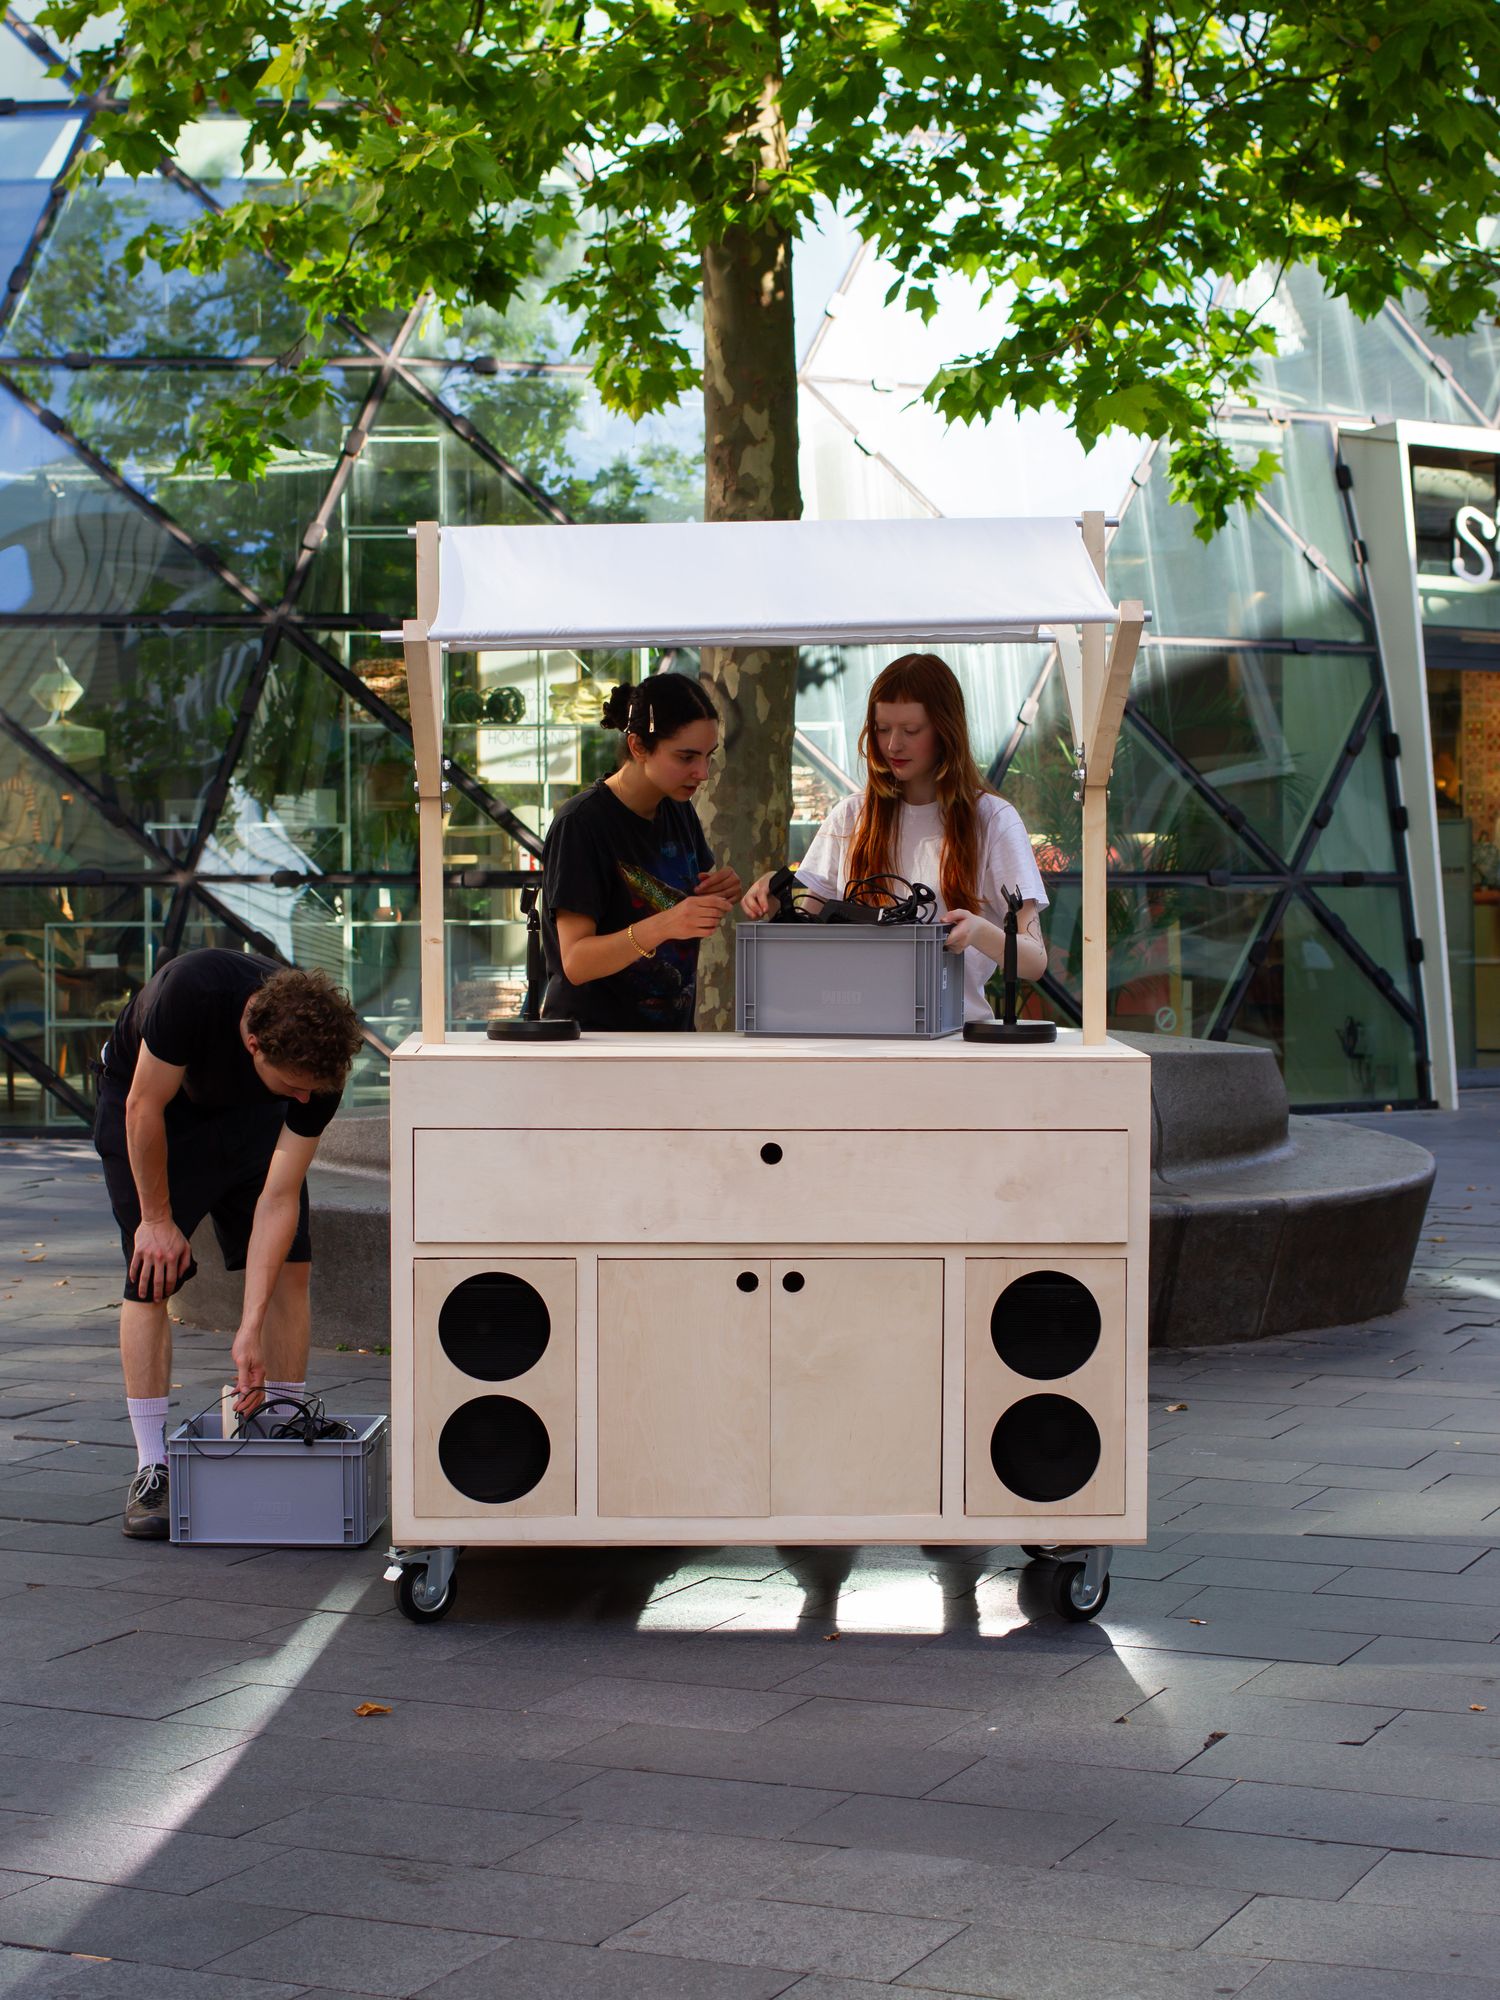
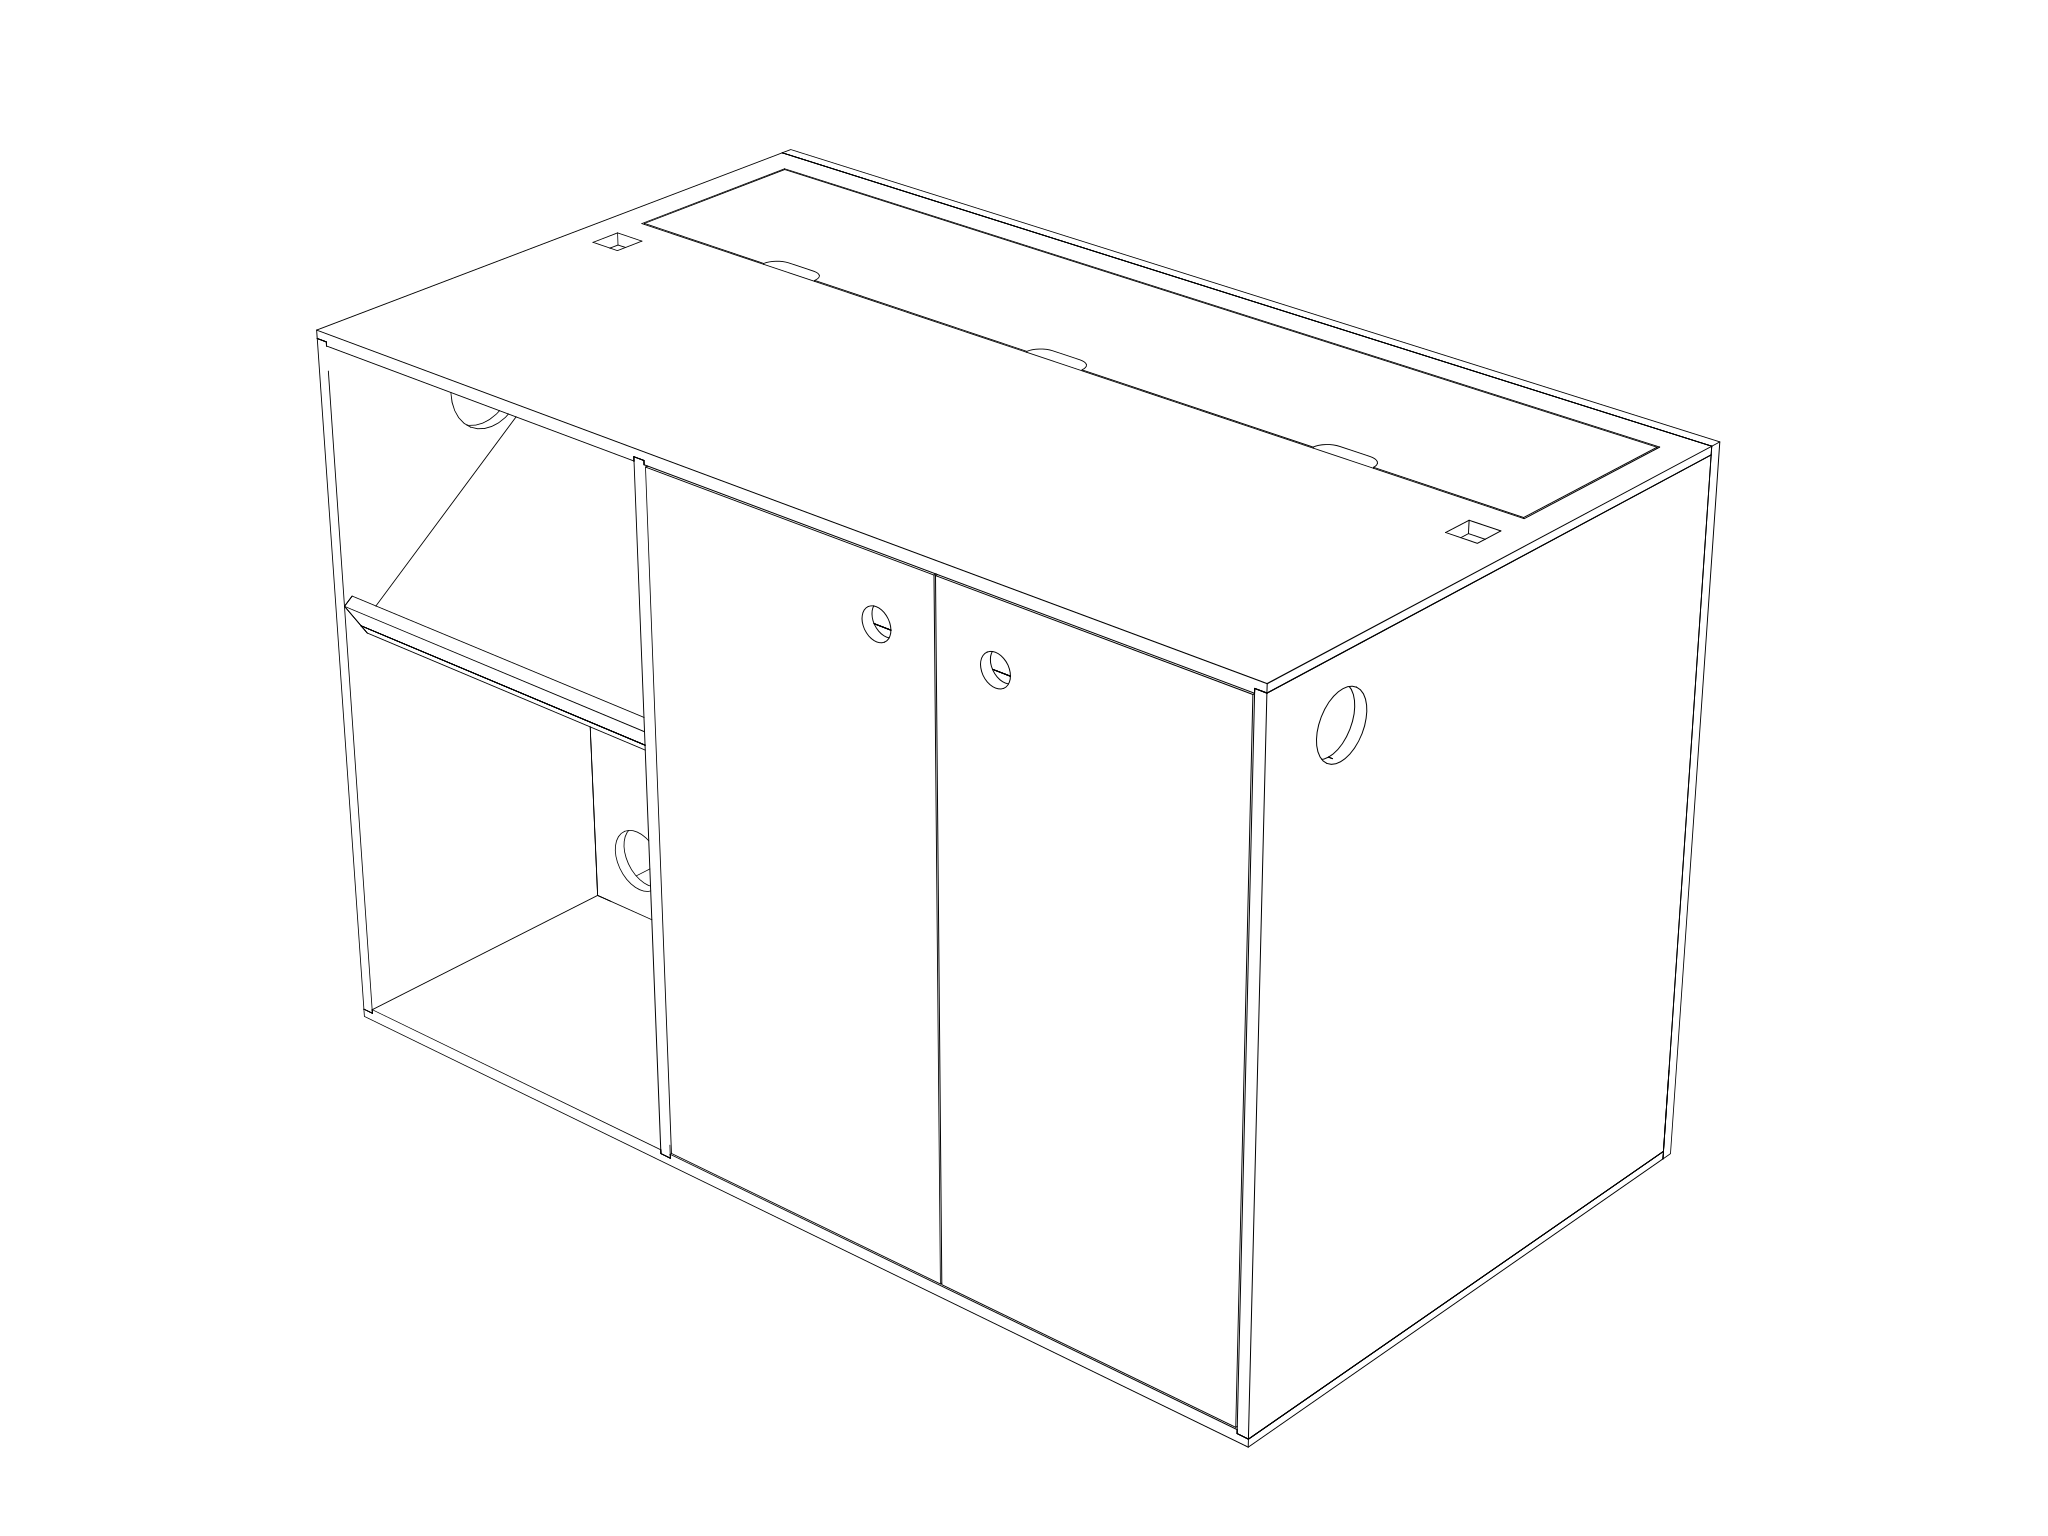
This is an open-source, nomadic radio cart and DJ booth designed for community radio stations. It is not a fixed object: it is a system. Built with parametric CAD, it can fit all the equipment an online radio can have: mixer, dj deck, turn tables, microphones, cables, and everything else. Depending on what tools you have access to, it can be manufactured three different ways: with basic hand tools, in a standard wood workshop, or with a CNC router. Always from sheet wood.
All design files, technical drawings, and construction manuals are free to download here.
Who is this for?
If you run a community radio and want to bring it outside: this is for you. If you don't have the technical knowledge to modify the parametric files, get in touch and we can work something out.
A radio is not just a stream: it is a place and people. This cart is designed to take that wherever you go.
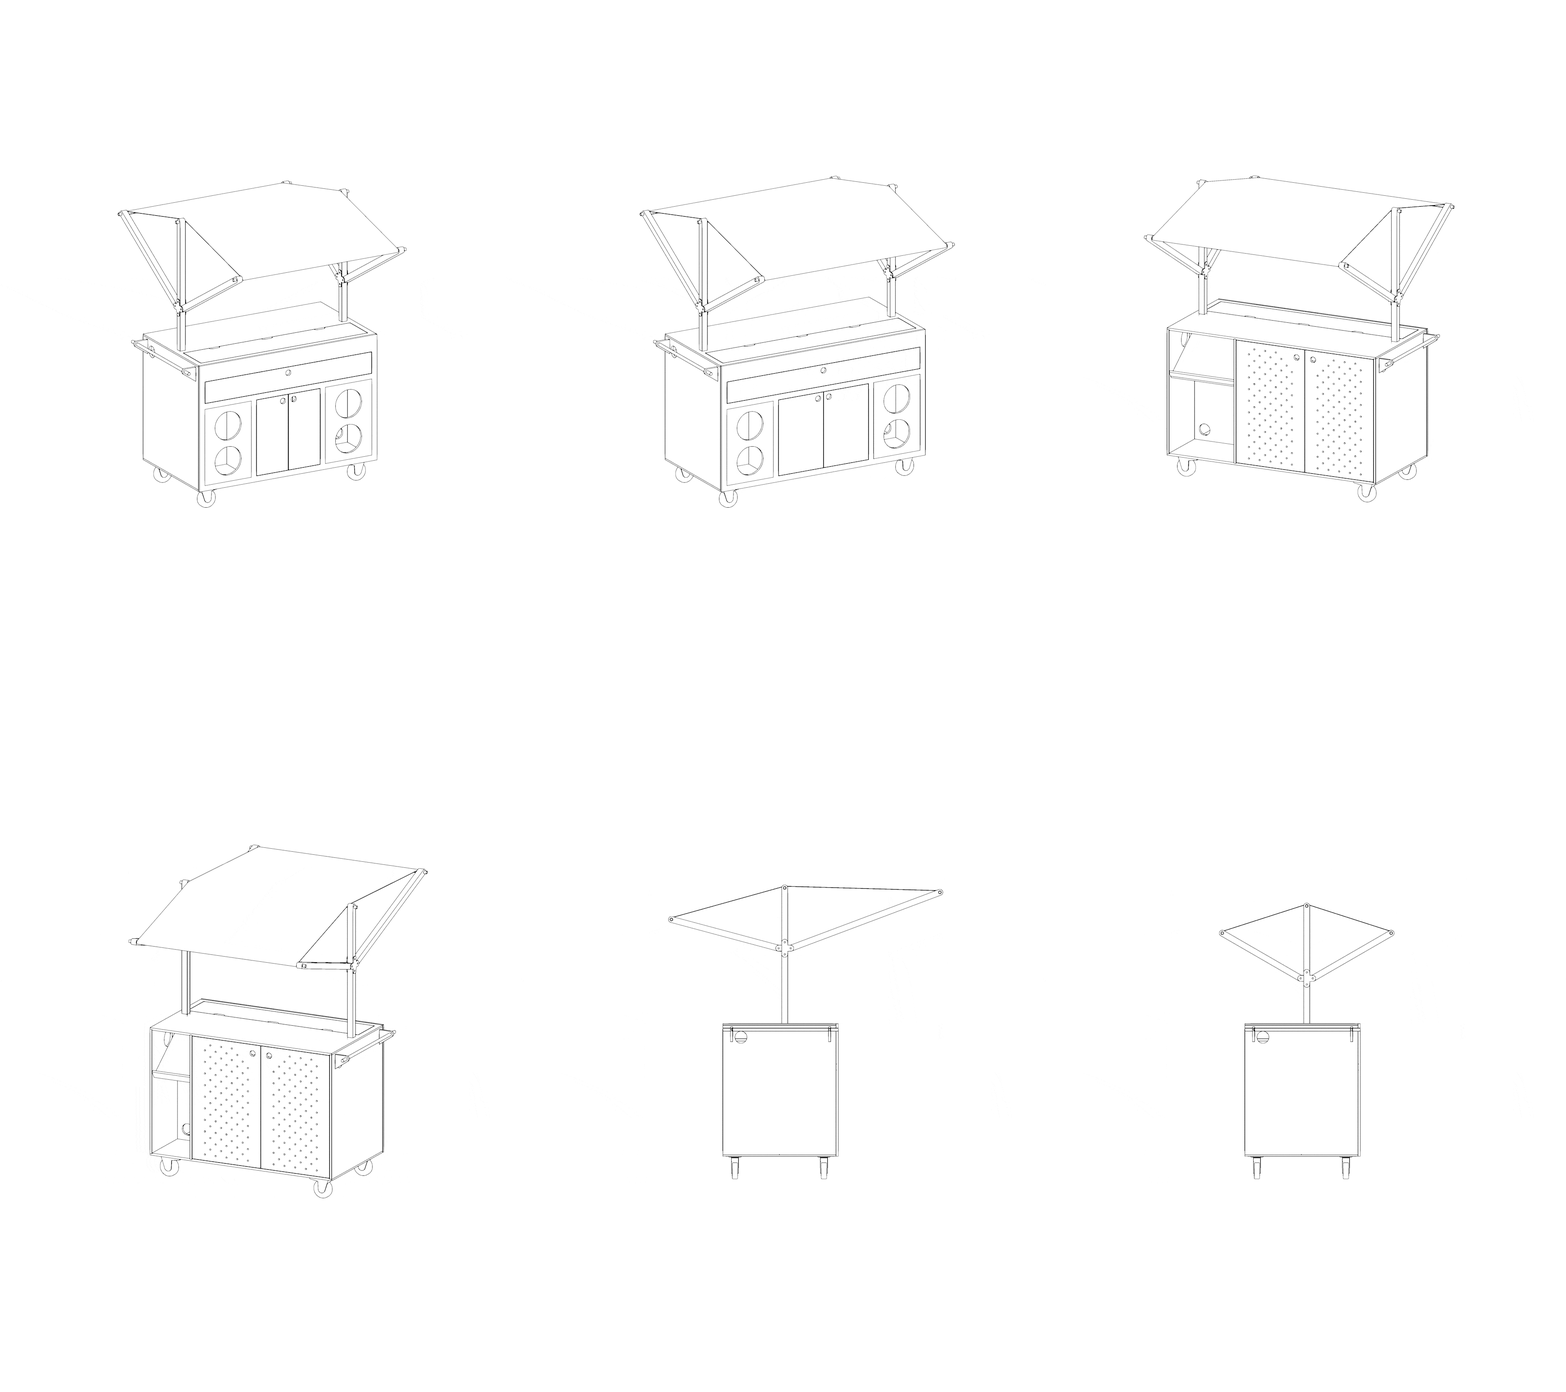
How to build this cart?
 Handtools
 Workshop
 CNC
CNC
Download the file and change its parametrics to the desired sizes if needed: file download link
-
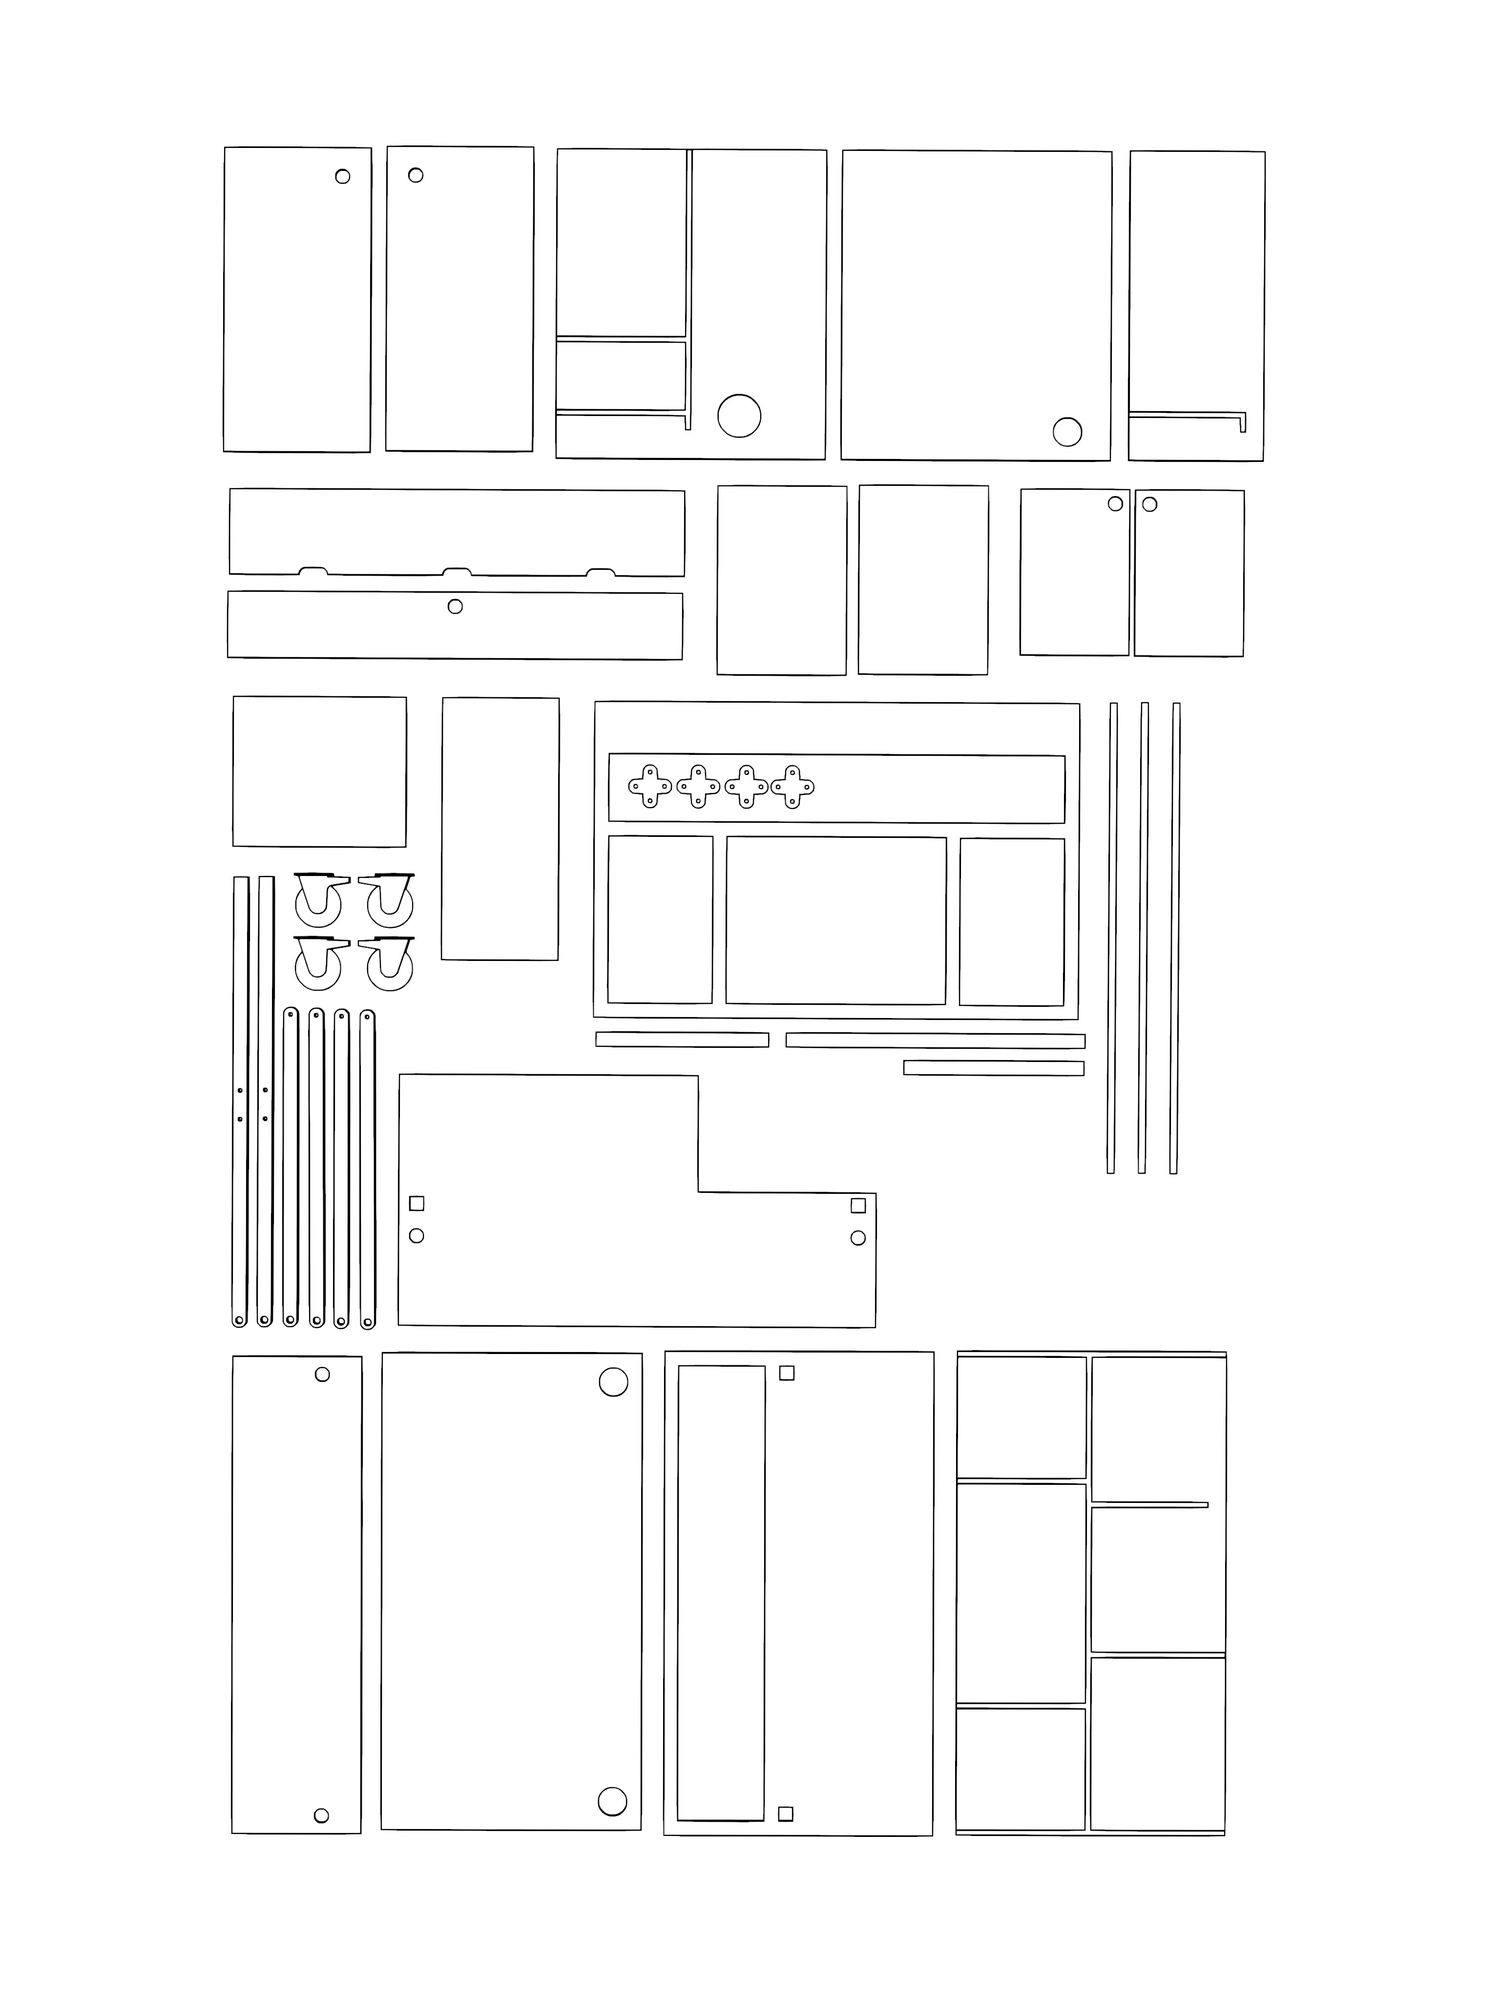
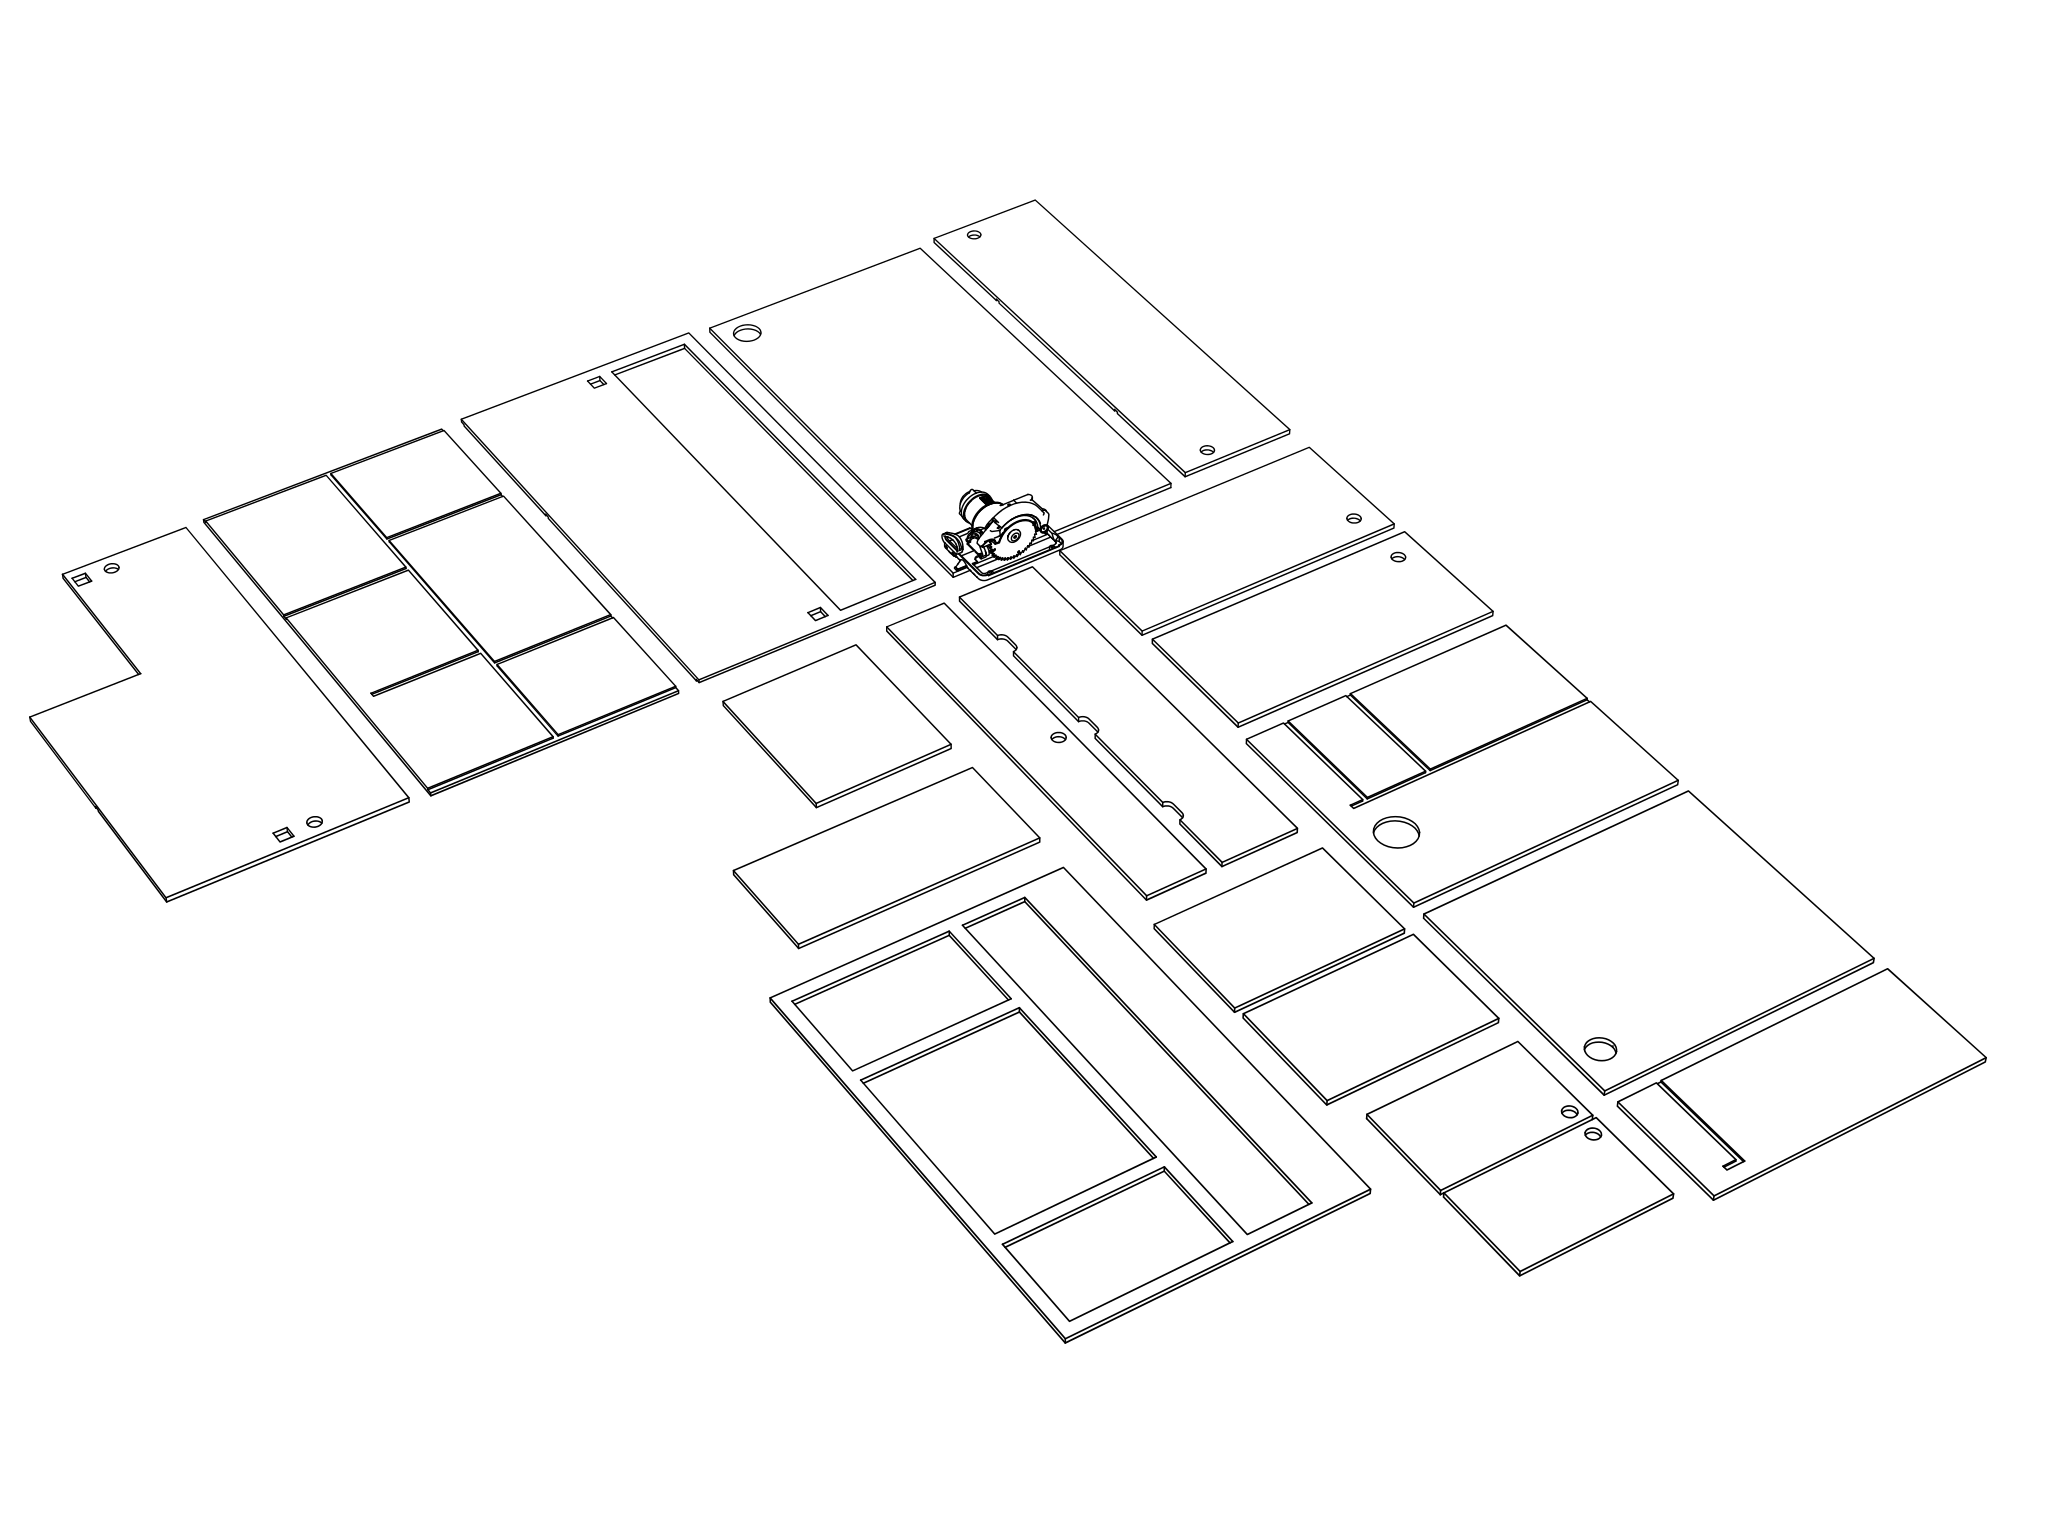
Get rid of the groove from the file and cut all sheets to size using a handsaw, or ask your local supply store.
Cut sheets to size using a tracksaw, table saw, jig saw.
CNC the file.
-
Mark locations for screws and pre drill (diameter of the drill should be 1mm smaller than the screws used), you can space them approximatively 100mm apart and counter sink the holes. For the peg doors, you can use an already made pegboard and screw it to the doors (or anywhere you would like it to be).
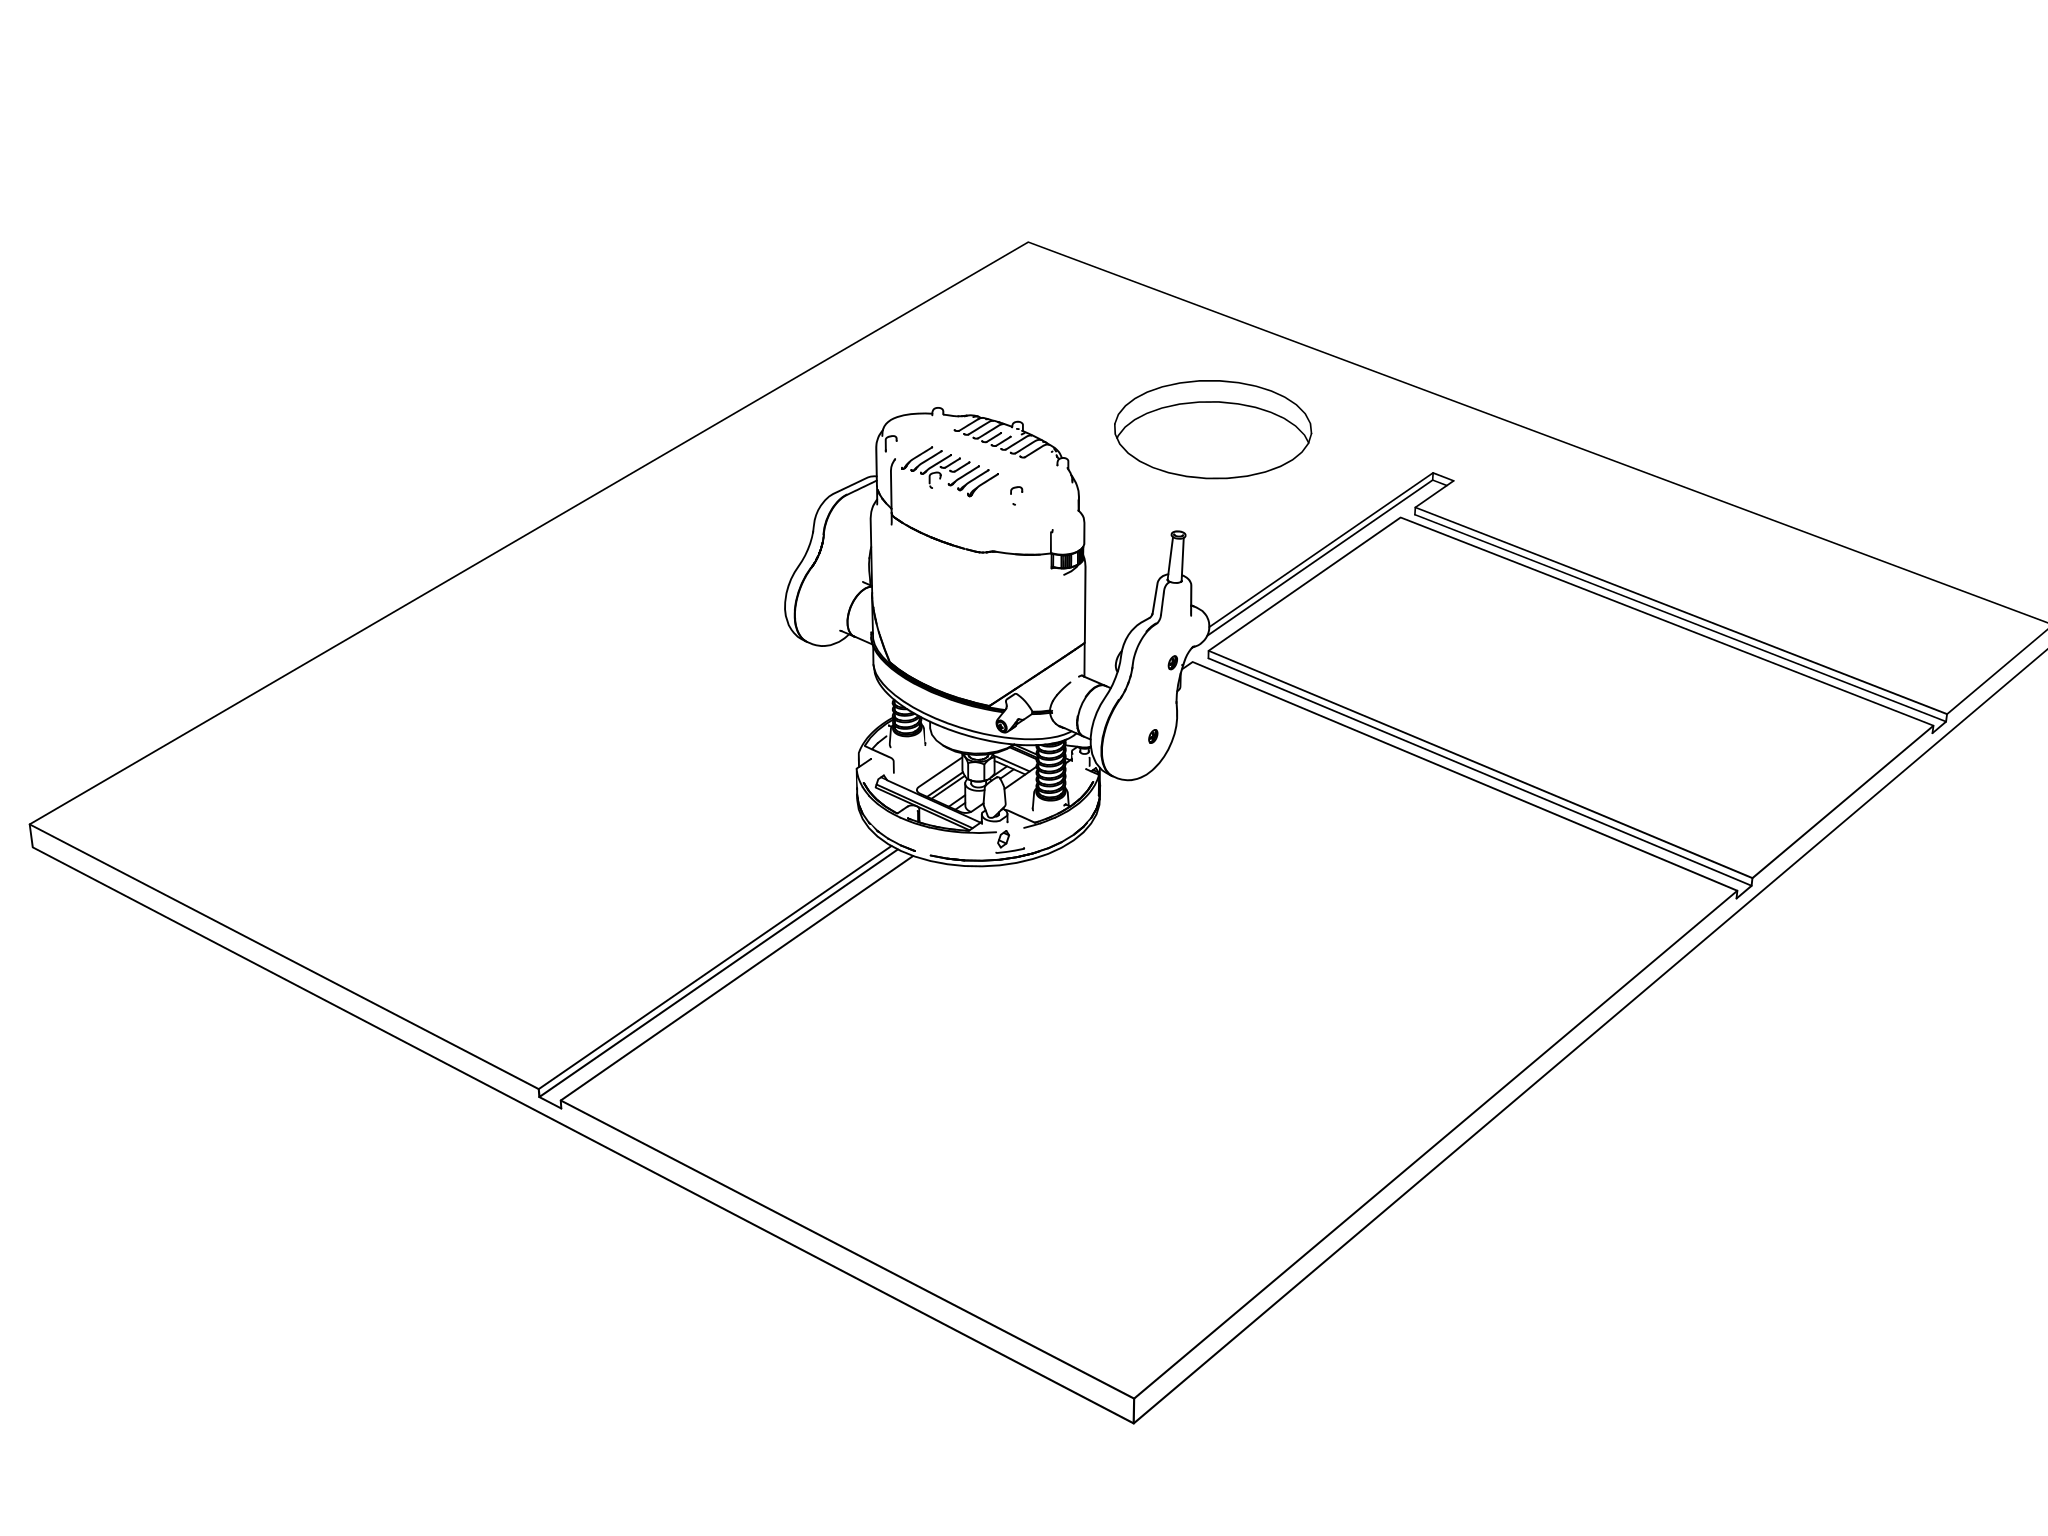
Using a router (with a cutting bit the size of the thickness of your planks) rout out all the grooves as shown in the model. Alternatively, you can use dominos or similar dowel techniques as a replacement for the grooves (faster).
-
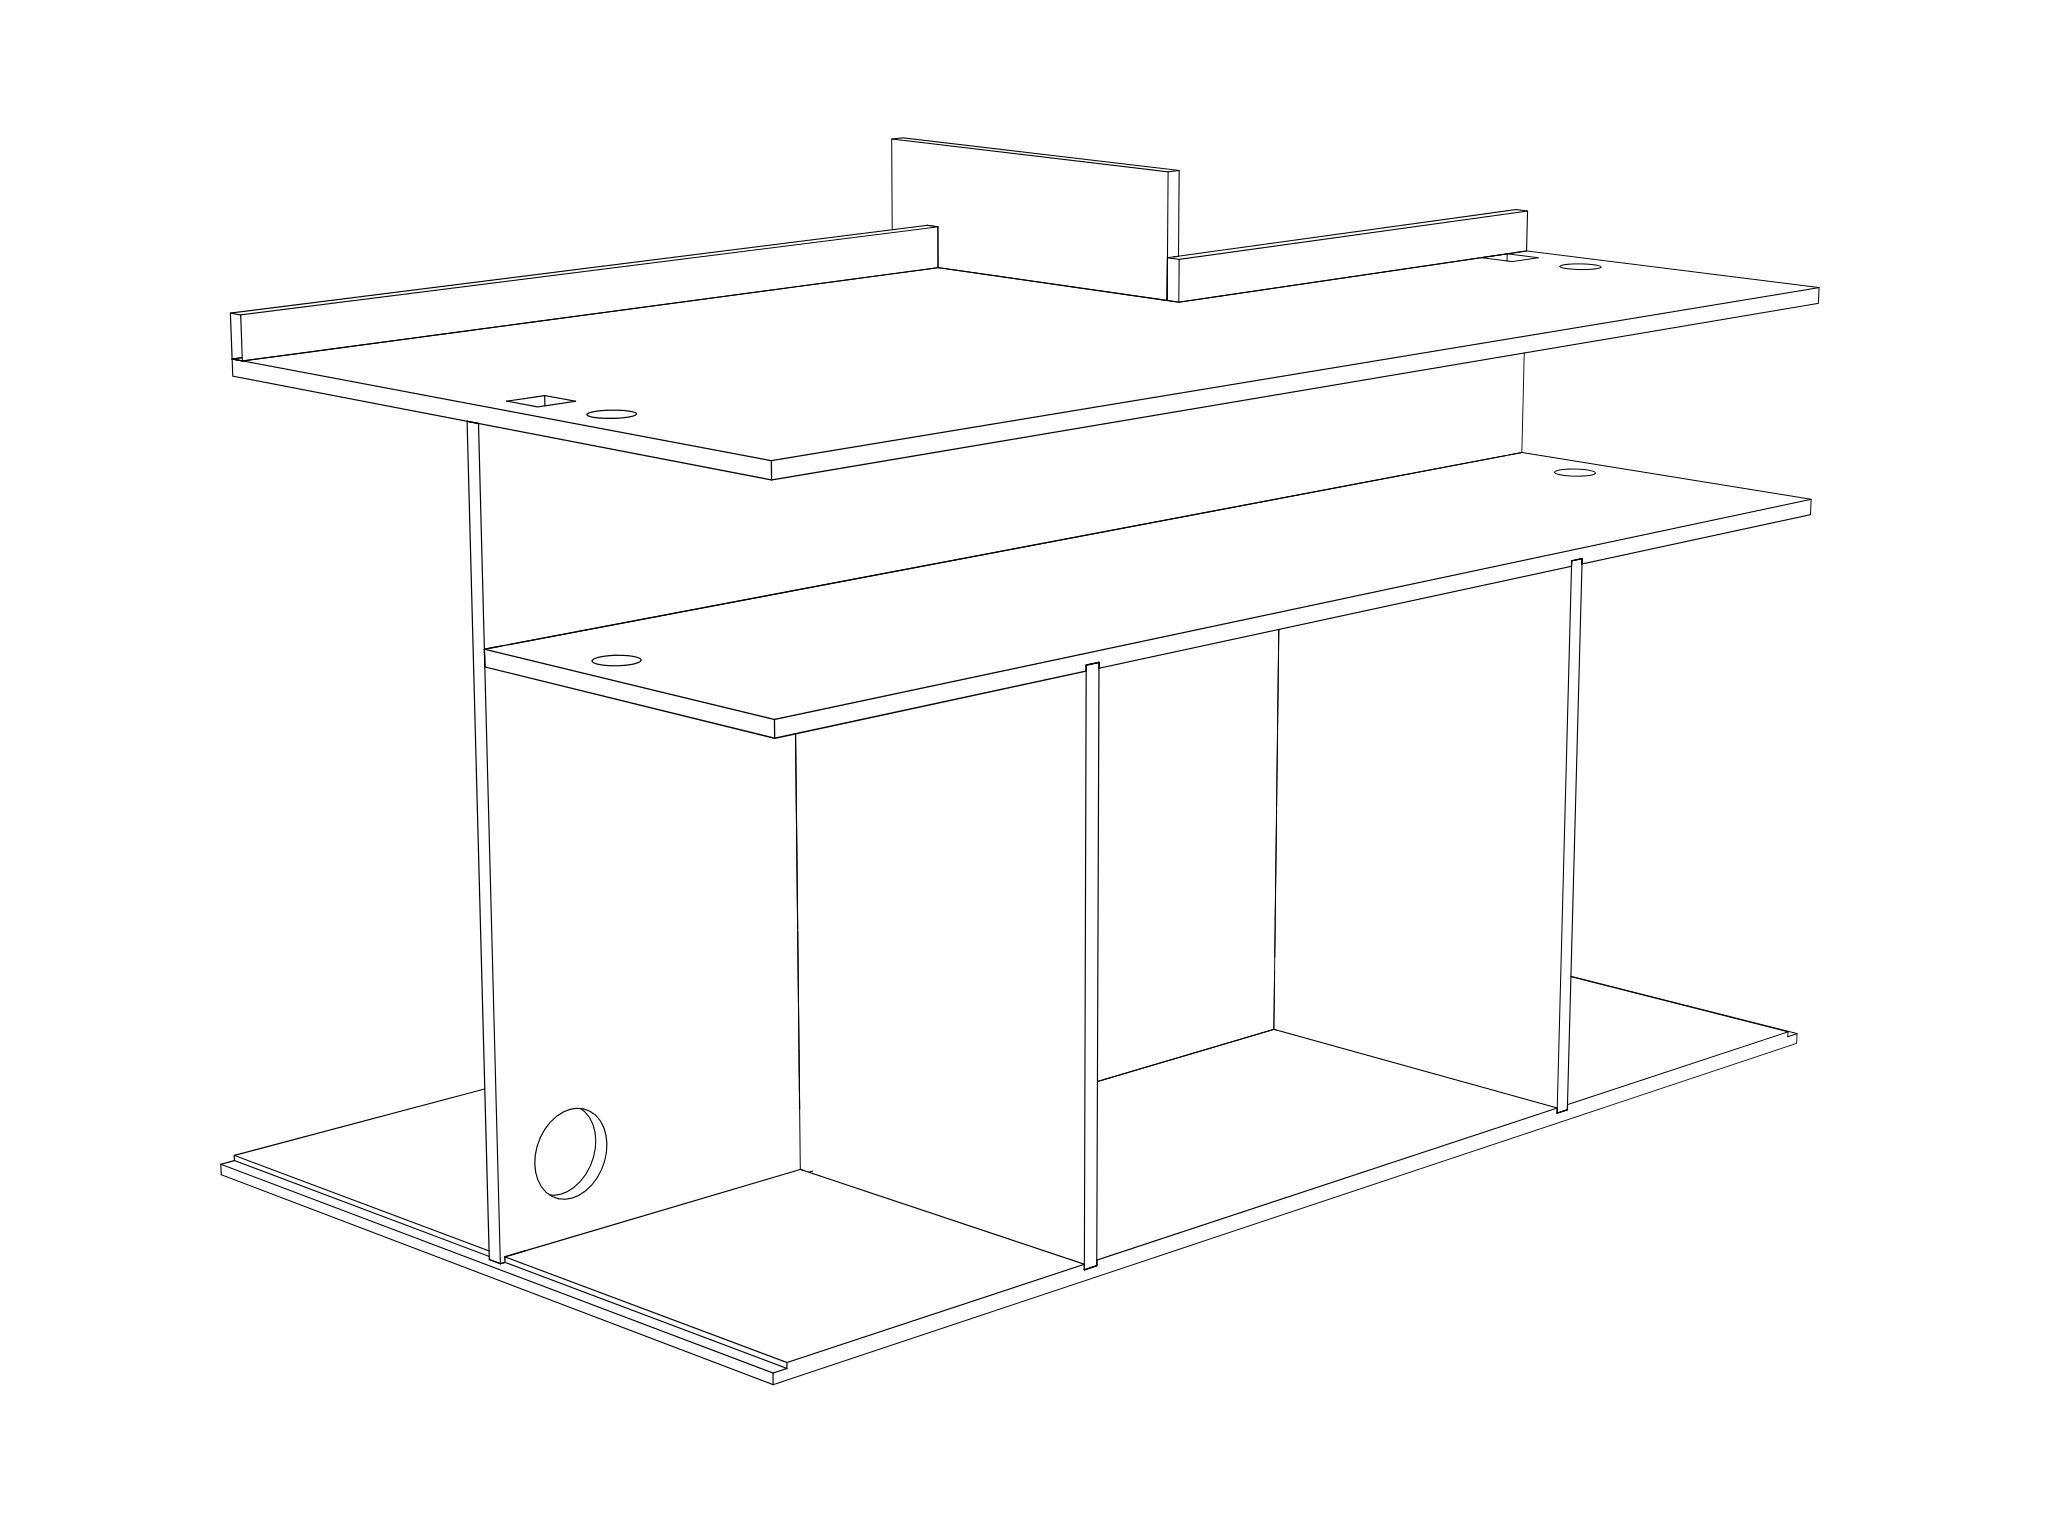
Screw and glue together the inside walls and shelves first.
Assemble glue and clamp the inside walls and shelves to the middle wall.
-
Glue and screw inside walls to bottom.
Insert inside walls into the bottom and screw from below (screws will only be visible from the bottom of the cart and add strength).
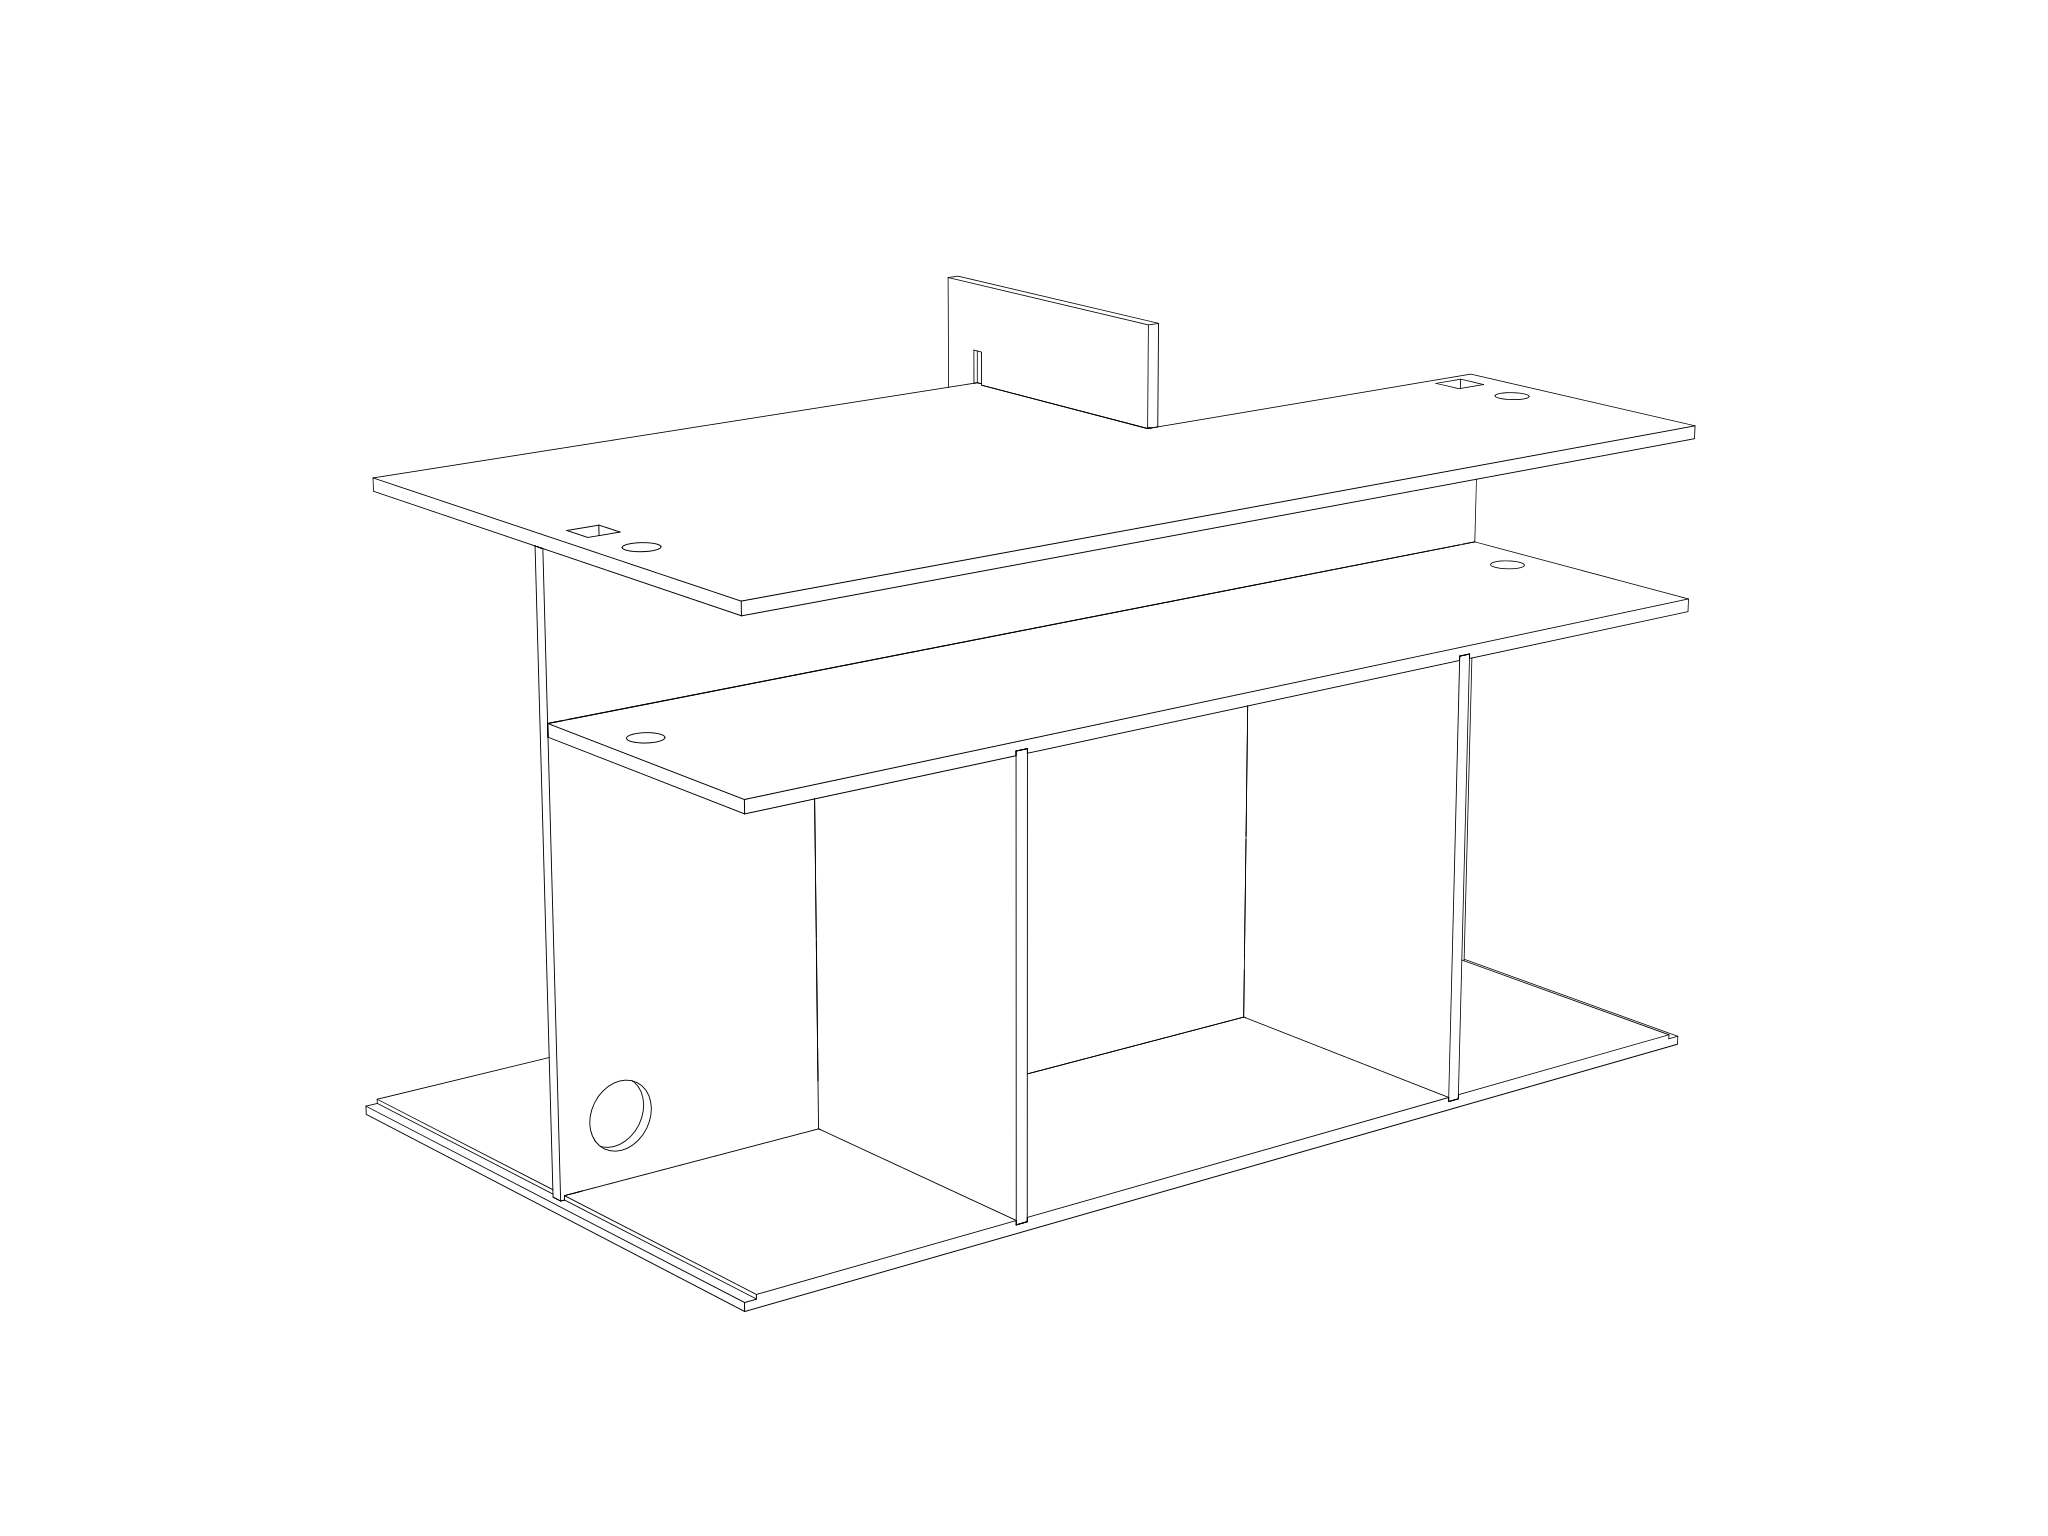
-
Glue and screw the front and the sides.
Glue and clamp the side walls.
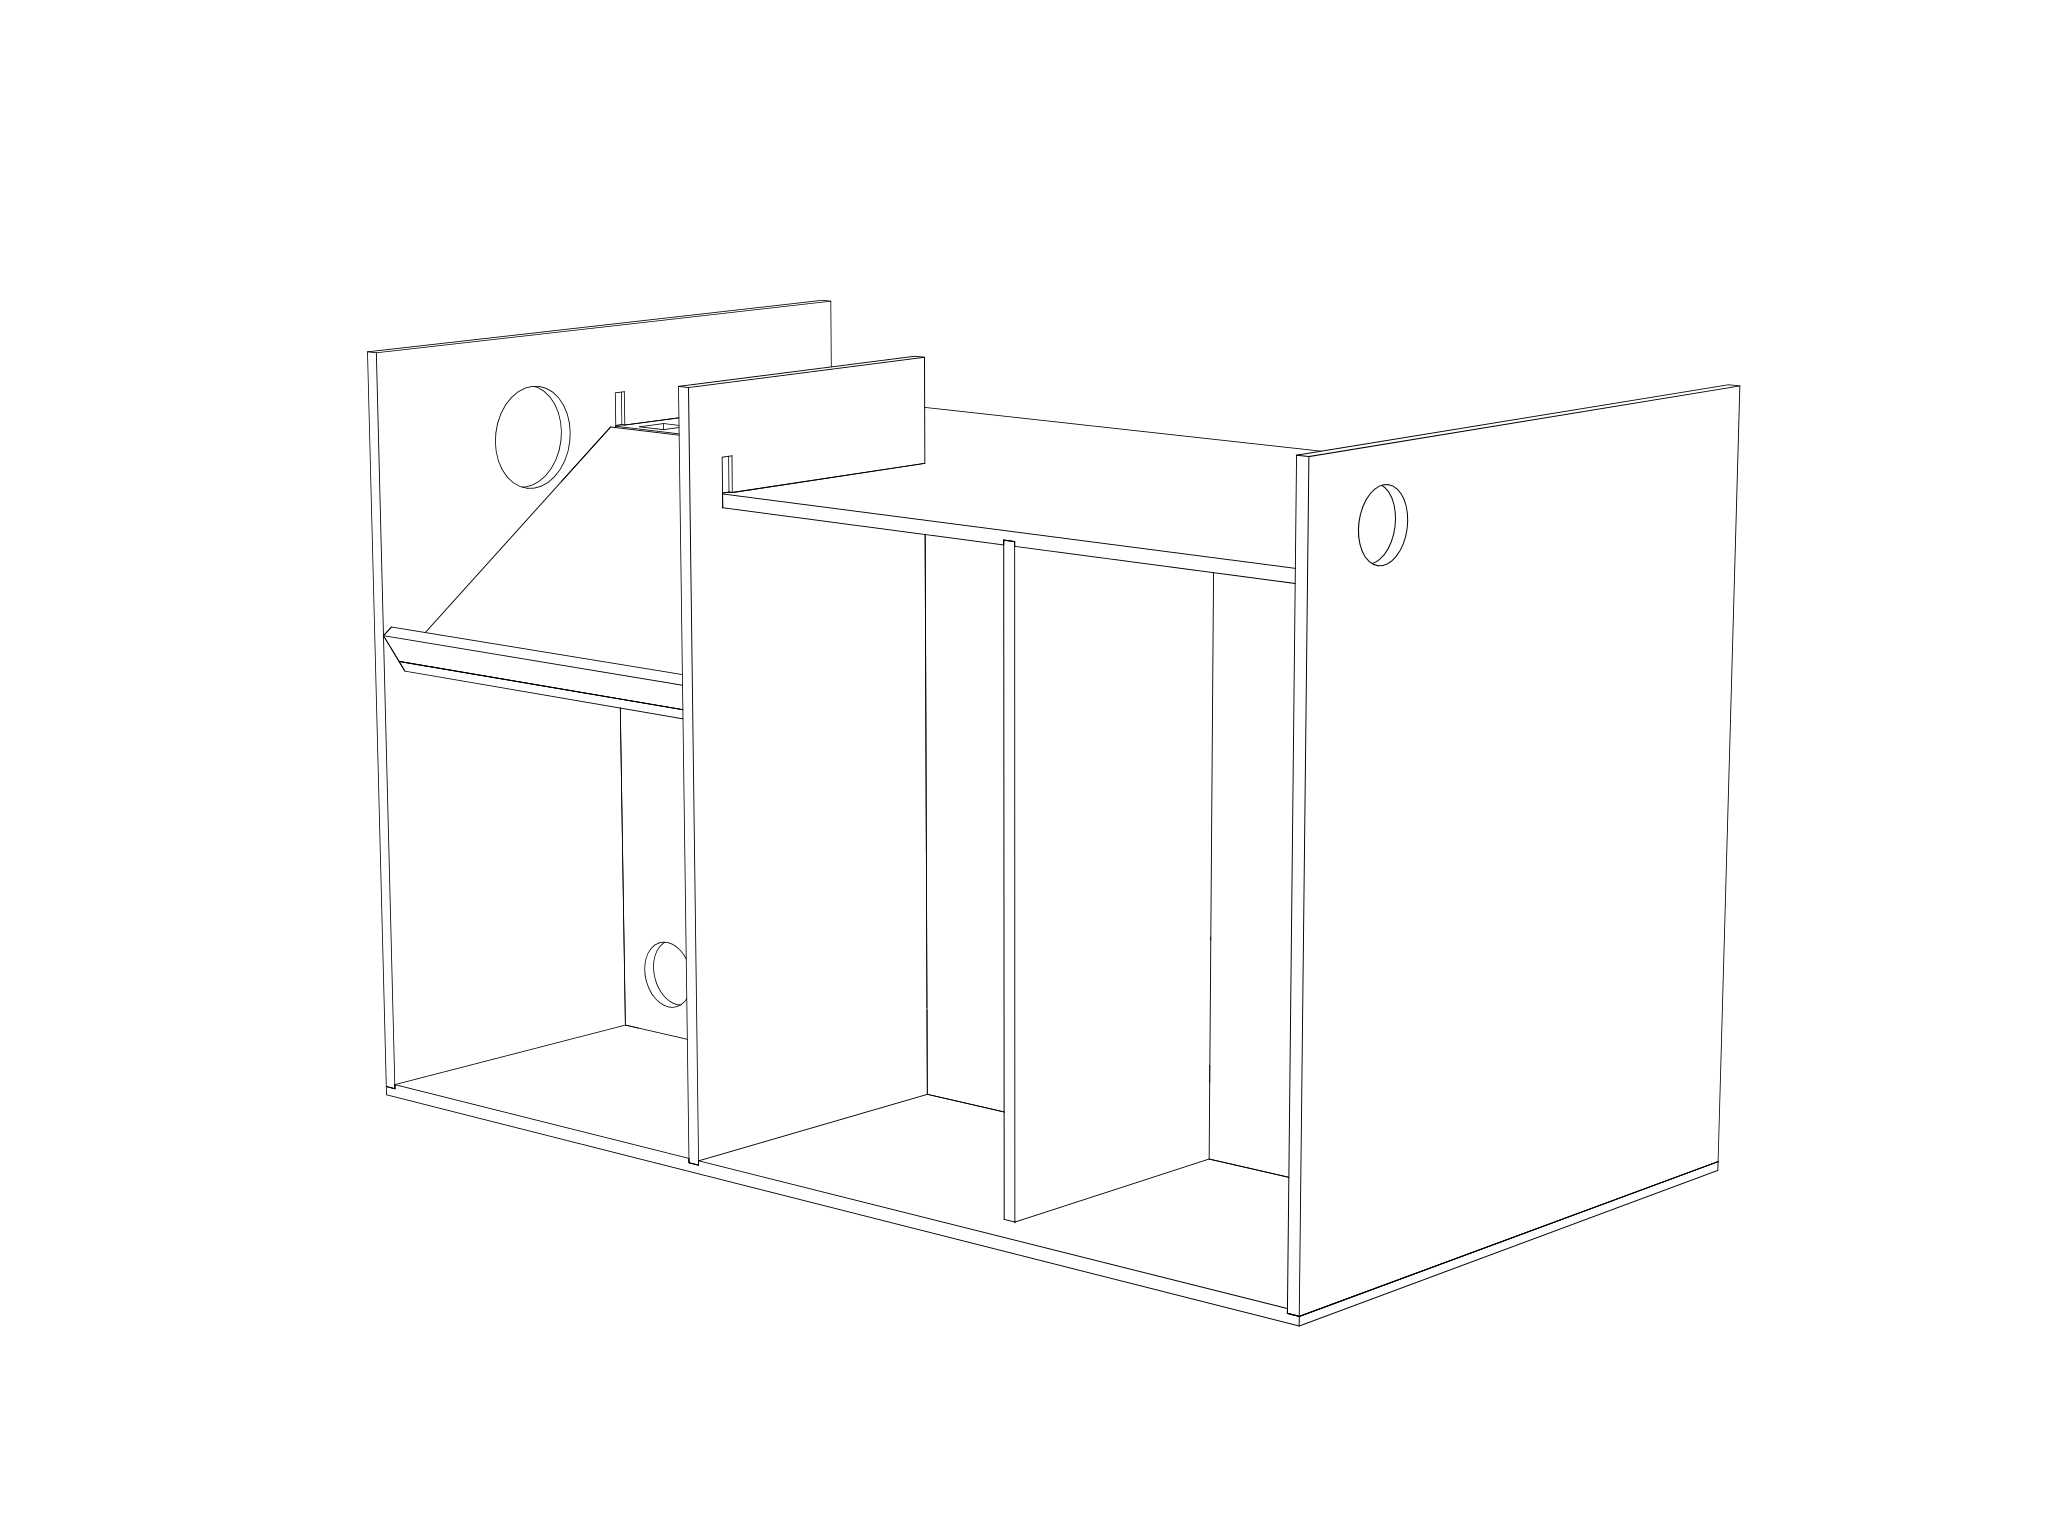
-
Glue and screw the top.
Glue and clamp the top.
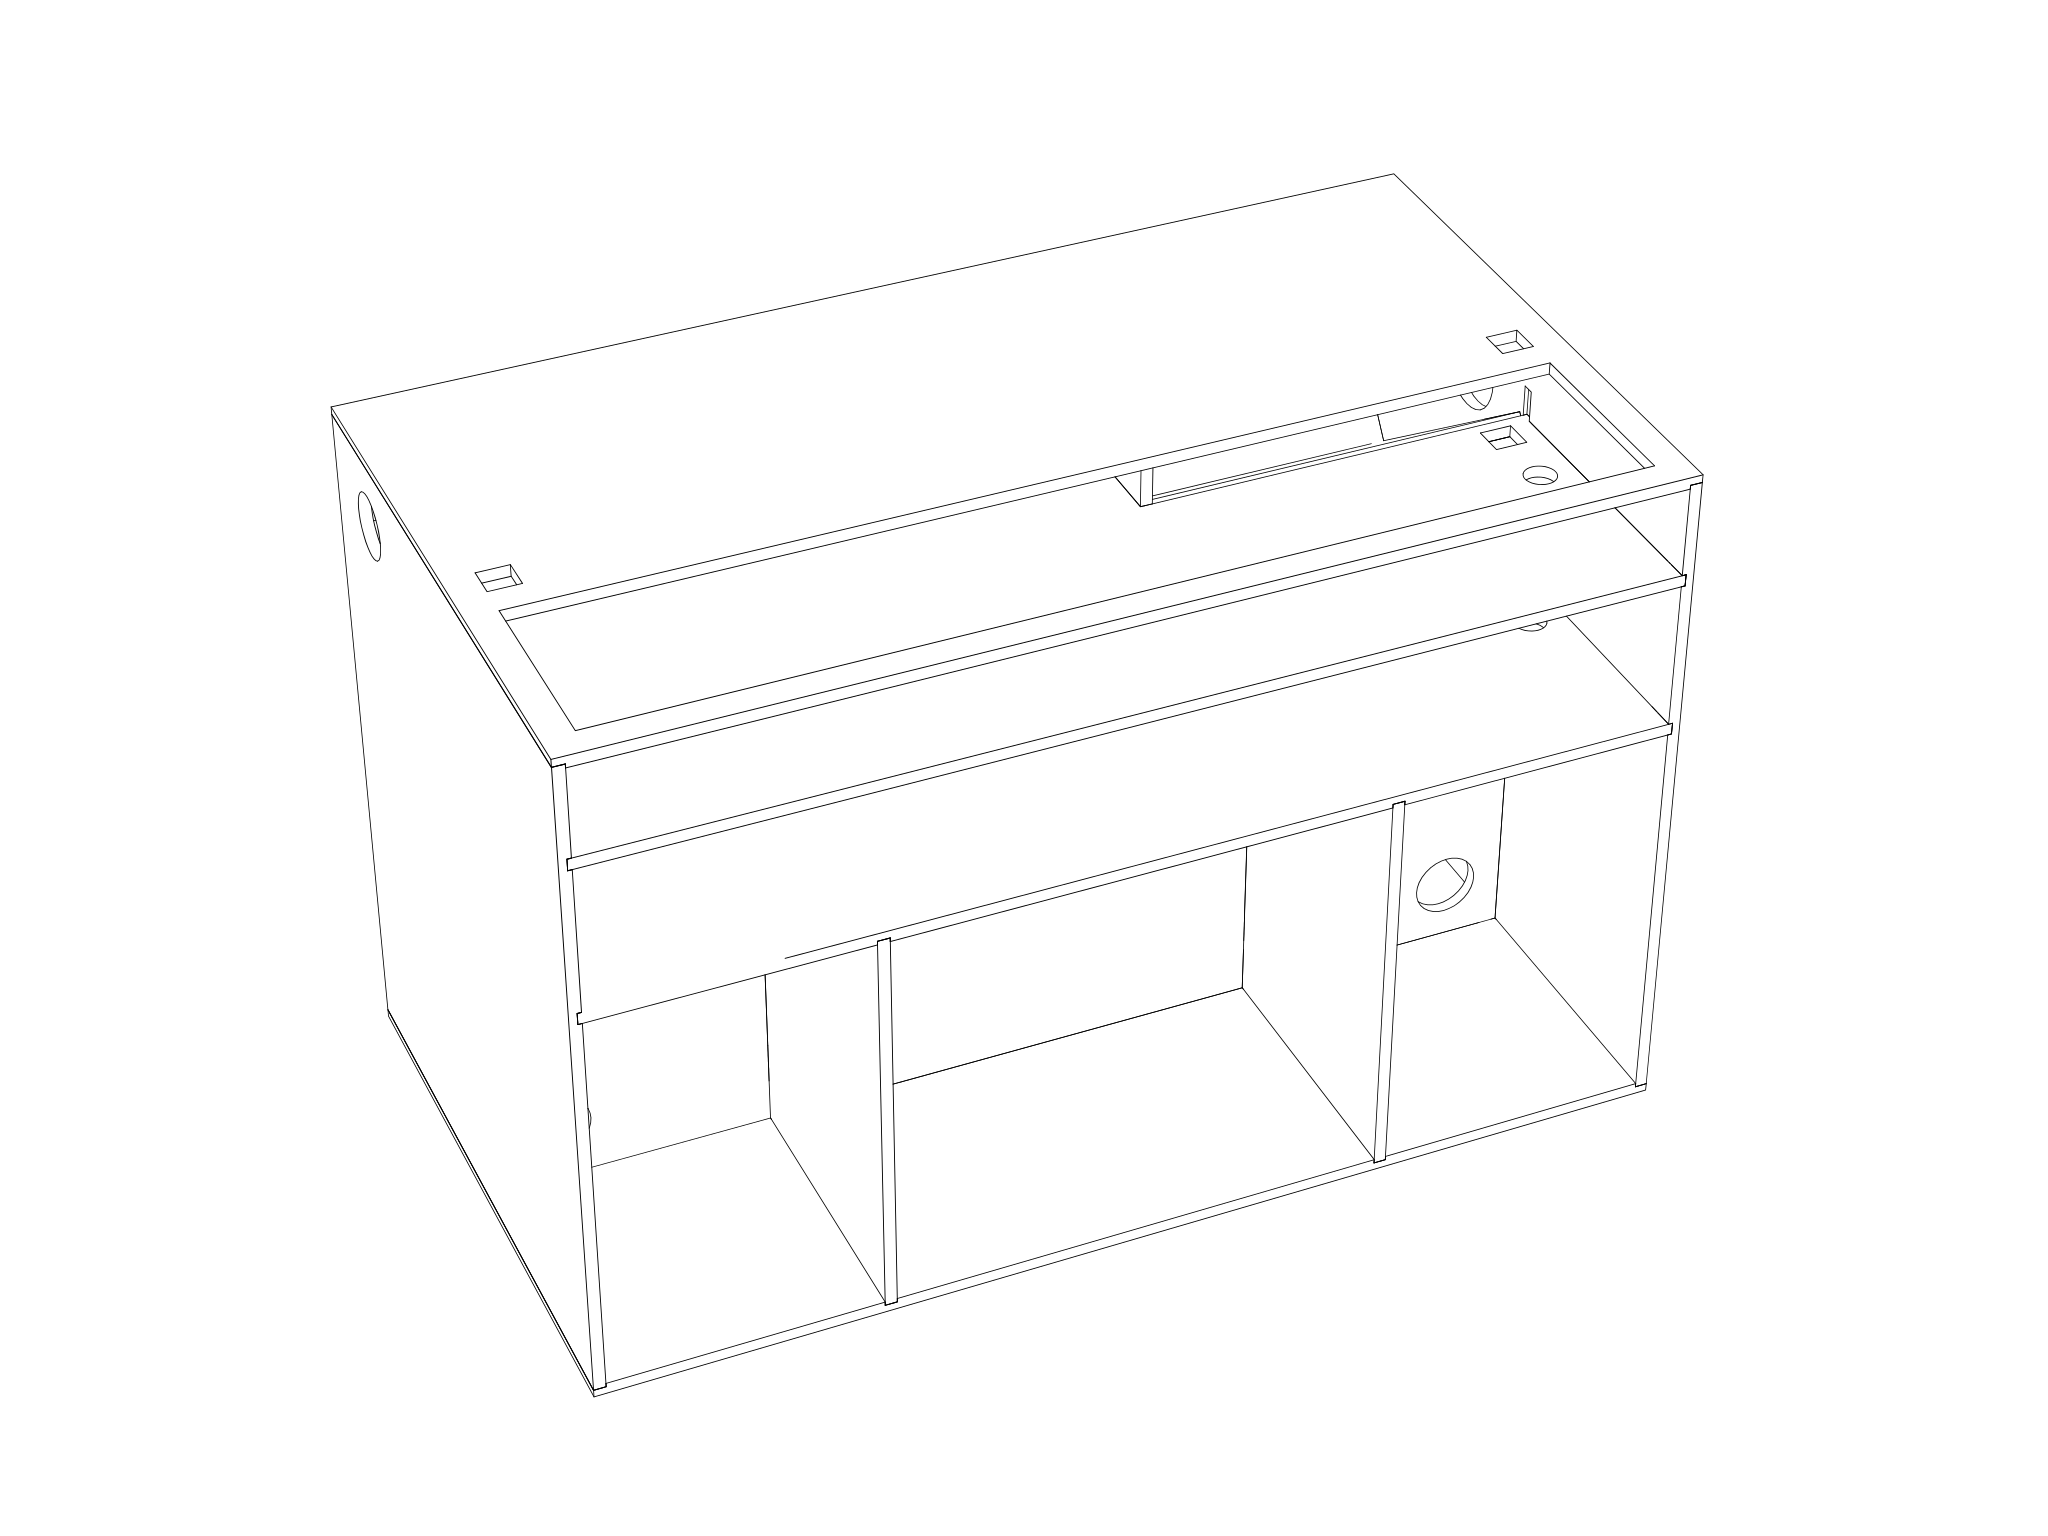
-
Glue and clamp the front (speaker side).
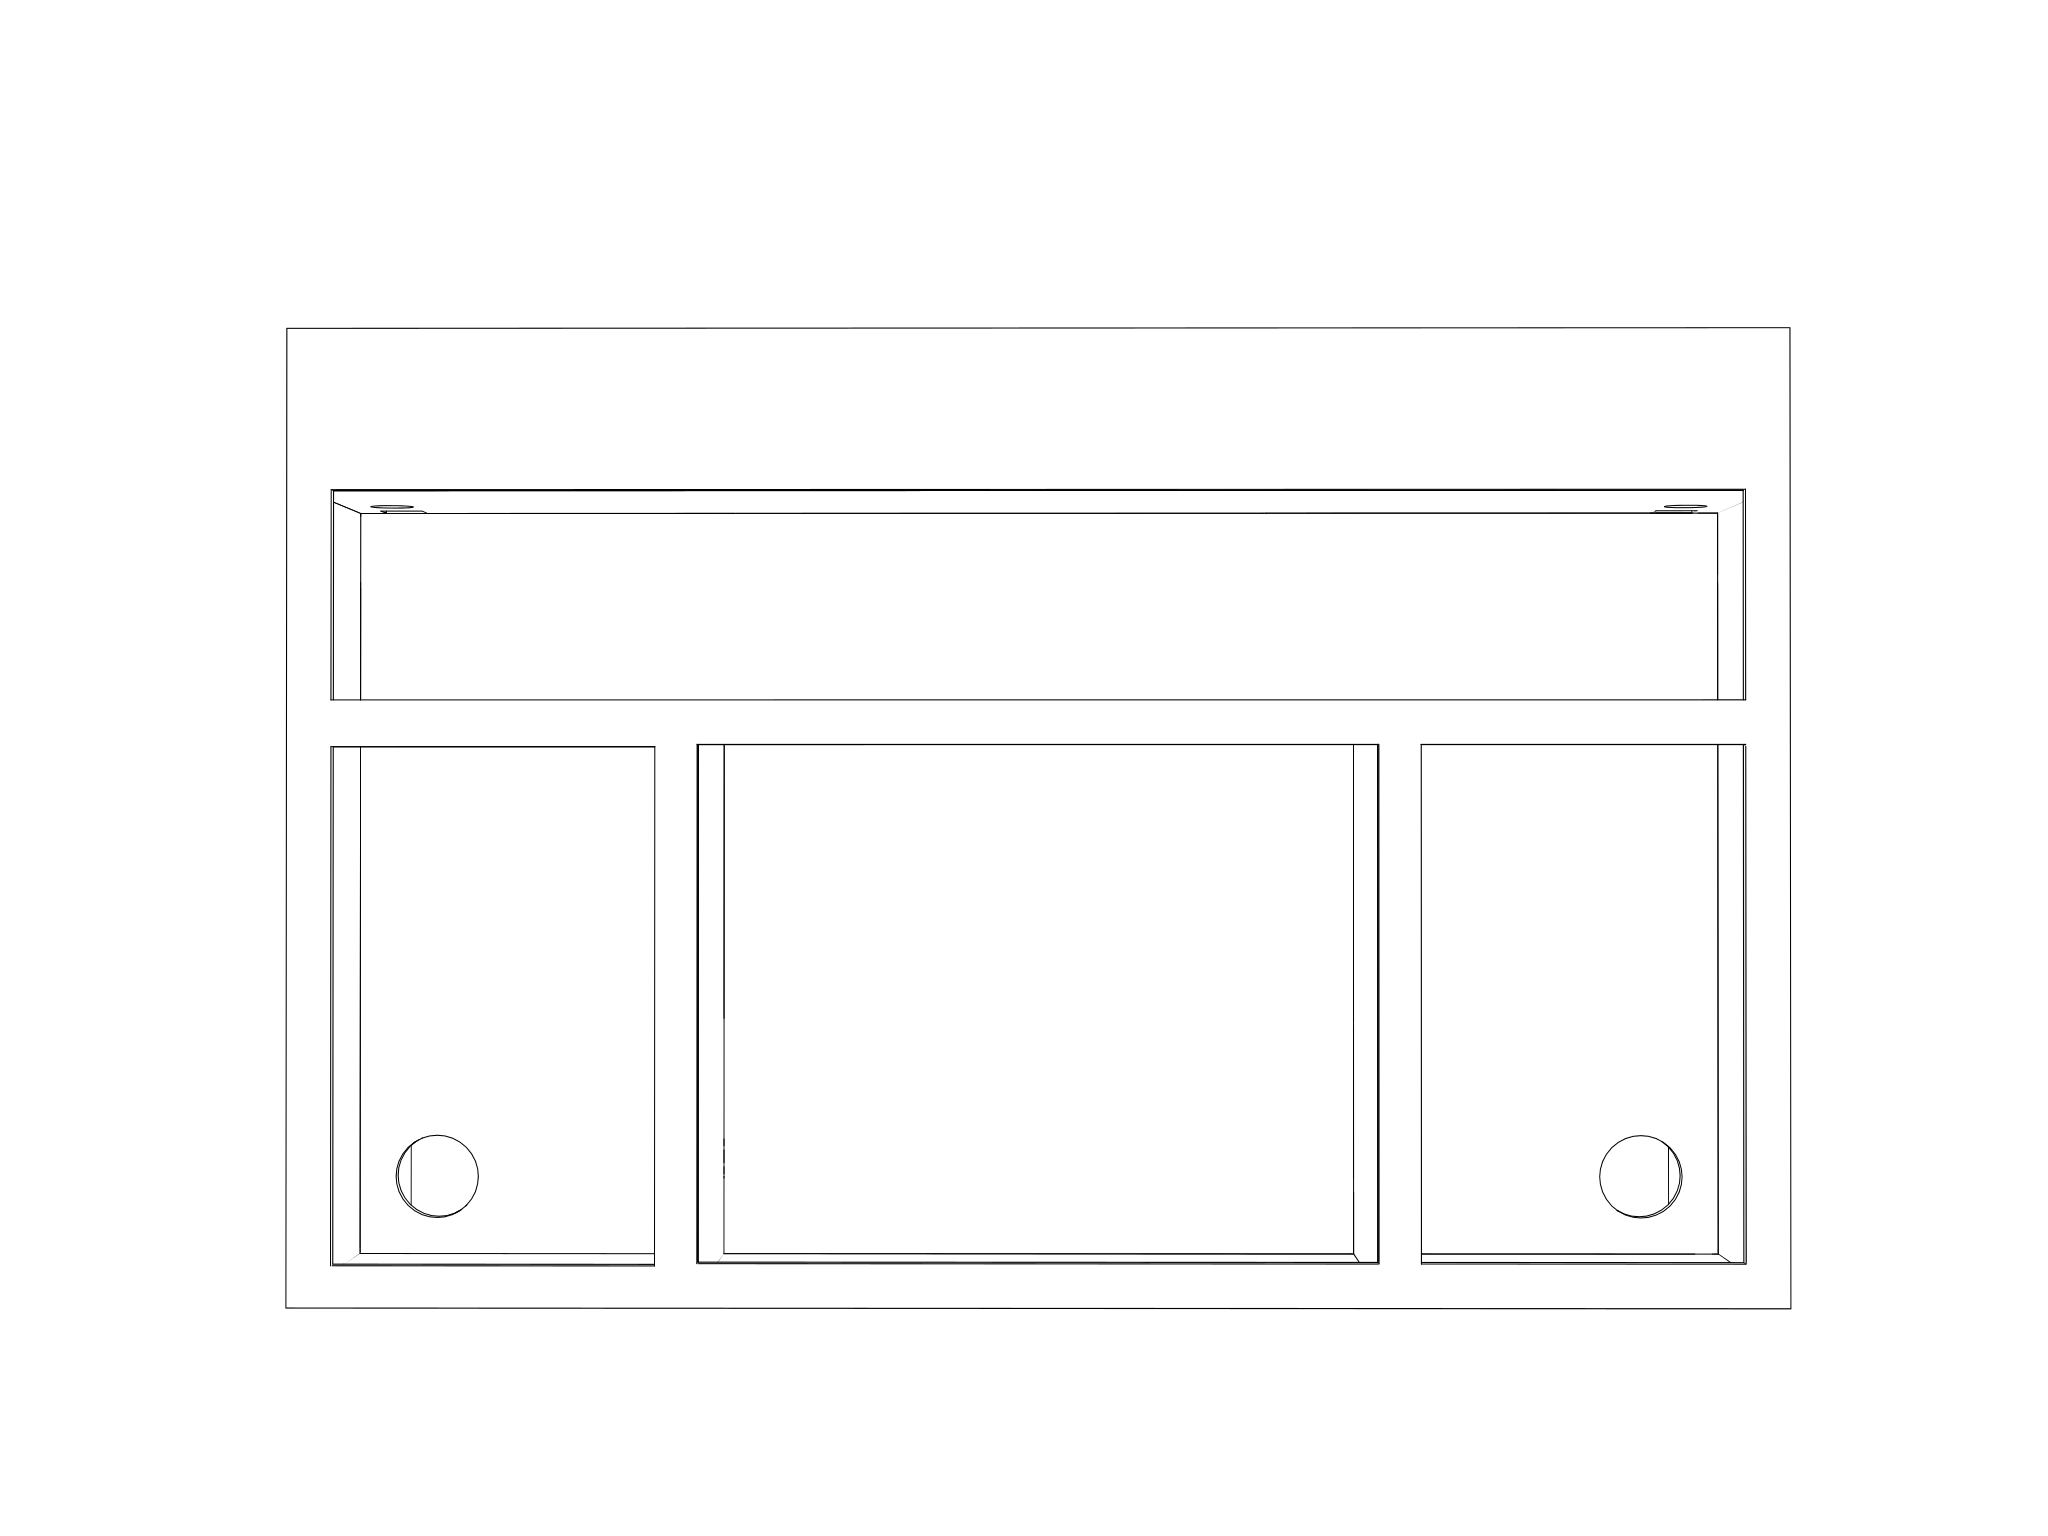
-
Drill the holes for the door hinges according to the specsheet of the chosen brands. Mount hinges, doors, magnets and any other hardware of your choice. Pre drill holes for the wheels and fix them with bolts and nuts (preferably carriage bolts).
- Kitchen cabinet hinge (all the doors, except for on top)
- Top one: invisible hinge, 10mm
-
If you counter sinked the drill holes you can fill them with wood filler. Sand and apply finishing of your choice! (Stain/laquer, paint, oil or wax)
Sand and apply finishing of your choice! (Stain/laquer, paint, oil or wax)
Roof instructions
Parts needed for the roof are found on the open structure website.
-
Using a metal saw, cut out the shape of the brackets out of 2mm steel. You can use the open structure grid for dimensions.
Using an angle grinder or metal bandsaw, cut out the shape of the brackets out of 2mm steel. You can use the open structure grid for dimensions.
With the DXF file of the brackets, laser cut them out of 2mm steel.
-
With a 10mm drill, drill out the mounting holes in the brackets.
With a 10mm drill in a drill press, drill out the mounting holes in the brackets.
-
Using a metal saw, cut the 20mm aluminium tubes to size.
Using a miter saw, cut the 20mm aluminium tubes to size.
-
Drill 10mm holes for locking pins in the aluminium tubes.
Using a drill press, drill 10mm holes for locking pins in the aluminium tubes.
-
Using a handsaw, cut the wooden beams to size.
Using a mitre saw, cut the wooden beams to size.
-
Drill 10mm holes in the beams for the mounting brackets.
Using a drill press, drill 10mm holes for the mounting brackets.
-
Drill 20mm holes in the beams for the aluminium tubes.
Drill 20mm holes in the beams for the aluminium tubes.
-
Attach beams together with the mounting brackets using M10 bolts, nuts and washers.
How to use the Fusion File?
If you don't have Autodesk Fusion here is how to download it for Free (to open this file)
This file was made in Autodesk Fusion. You can open and use it for free with a Personal Use license (no paid subscription needed for hobby/non-commercial use).
- Go to autodesk.com/products/fusion-360/personal
- Click »Fusion for personal use», not the «Free Trial» button (that one only lasts 30 days and gives you the full paid version temporarily).
- Sign in with an Autodesk account, or click to create a free one if you don't have one.
- Fill in your basic info and confirm you qualify (non-commercial, personal/hobby use, under $1,000/year revenue from it).
- Verify your email via the link Autodesk sends you, then log back in.
- Click Download Now. This downloads the installer to your computer.
- Open the downloaded installer file and click «Yes» if your OS asks for permission to run it.
- Fusion will install automatically. This may take a few minutes.
- Once installed, open Fusion and sign in with your Autodesk account again if prompted.
- You may be asked to set up a «Hub» (your workspace for projects), default settings are fine.
Opening the file from this site
- Download the
.f3d(or.f3z) file from this page and save it somewhere you can find it, like your Desktop or Downloads folder. - Open Fusion.
- Click File → Open (or the folder/Open icon in the top toolbar).
- In the dialog, choose Upload (Fusion stores files in the cloud, so you typically upload local files into your Hub first).
- Select the file you downloaded and upload it.
- Once uploaded, it'll appear in your project list: double-click it to open it in the Fusion workspace.
Note: Fusion's free personal license limits you to 10 active documents at a time. If you hit that limit, you can mark older files as inactive instead of deleting them.
1 - How to adjust the parameters
2 - Exporting parts for the CNC
3 - Exporting plan drawings
4 - Exporting individual dimensions for hand tools
Contact
Got questions about building the cart, want help adapting the design for your space, or just want to share what you made with it? Get in touch.
zoebruhat@gmail.comWe're especially happy to hear from you if:
- You don't have the technical skills to modify the parametric files yourself, and need a hand adapting the design to your tools or space
- You built one and want to send photos, feedback, or improvements: this project gets better when people share what they learn
- You're stuck on manufacturing (hand tools, workshop, or CNC) and need troubleshooting
- You want to use this for a project beyond community radio and aren't sure if it fits
- You spotted an error in the files or manuals